
Rigging an outrigger canoe is a tradition that has been passed down through generations. Instructions have been passed down orally from kupuna to keiki. Writing anything down risks offending long held traditions of some because there is not one single way to rig, and each club or even groups within clubs have variations. These instructions show one way of doing it. Rigging goes beyond just attaching ama to iako and includes ama distance from the canoe, shimming, trim and adjustments for conditions, crew ability and weight. Those aspects you will need to learn form another source.
Sadly the art of rigging is not being taught very well these days. Look at any race or regatta and you will see some poor rigging examples, using methods that don’t make sense. It is an art form and not something that you can figure out ten minutes before you are supposed to be on the water. Like any skill worth learning this takes practice, practice, and more practice. With these instructions as a start and the rigging practice jigs you can become an accomplished rigger!
Rigging ama to iako with cotton rigging cord is amazingly effective as it provides just the right balance between structural integrity and flexibility. If not structurally sound the rigging could fail, and if too rigid can cause breakage as the large forces of the ocean, six paddlers and 400 pounds of canoe act against it. It is because of this balance that the technique remains in use to this day.
Regardless of how you rig some things are universally true;
- The peg is not a structural anchoring point but only a guide for positioning cord. It offers no strength for rigging to depend on. Wrapping cord around the peg does not make anything stronger and risks snapping the peg off.
- Rigging strength comes from spreading the force over the surface area of the iako and ama. Cord on cord does not add strength, cord parallel to cord over surface area is preferred.
- New cord needs to be stretched out first. Use two people wrapping behind the back or one person and a fixed lamp post or similar. Always stretch cord when dry. The ends of new cord need to be taped to prevent fraying.
- Rigging is best done with a helper who can pull cord through and keep it from getting sandy etc.
Note that rigging cord is a special weave and size that you won’t find at a hardware store and must be ordered from a paddling supply store.
Rigging is accomplished in three steps;
- Wrapping cord through ama holes and over iako.
- Frapping cord around the prior wraps.
- Finishing off
Wrapping
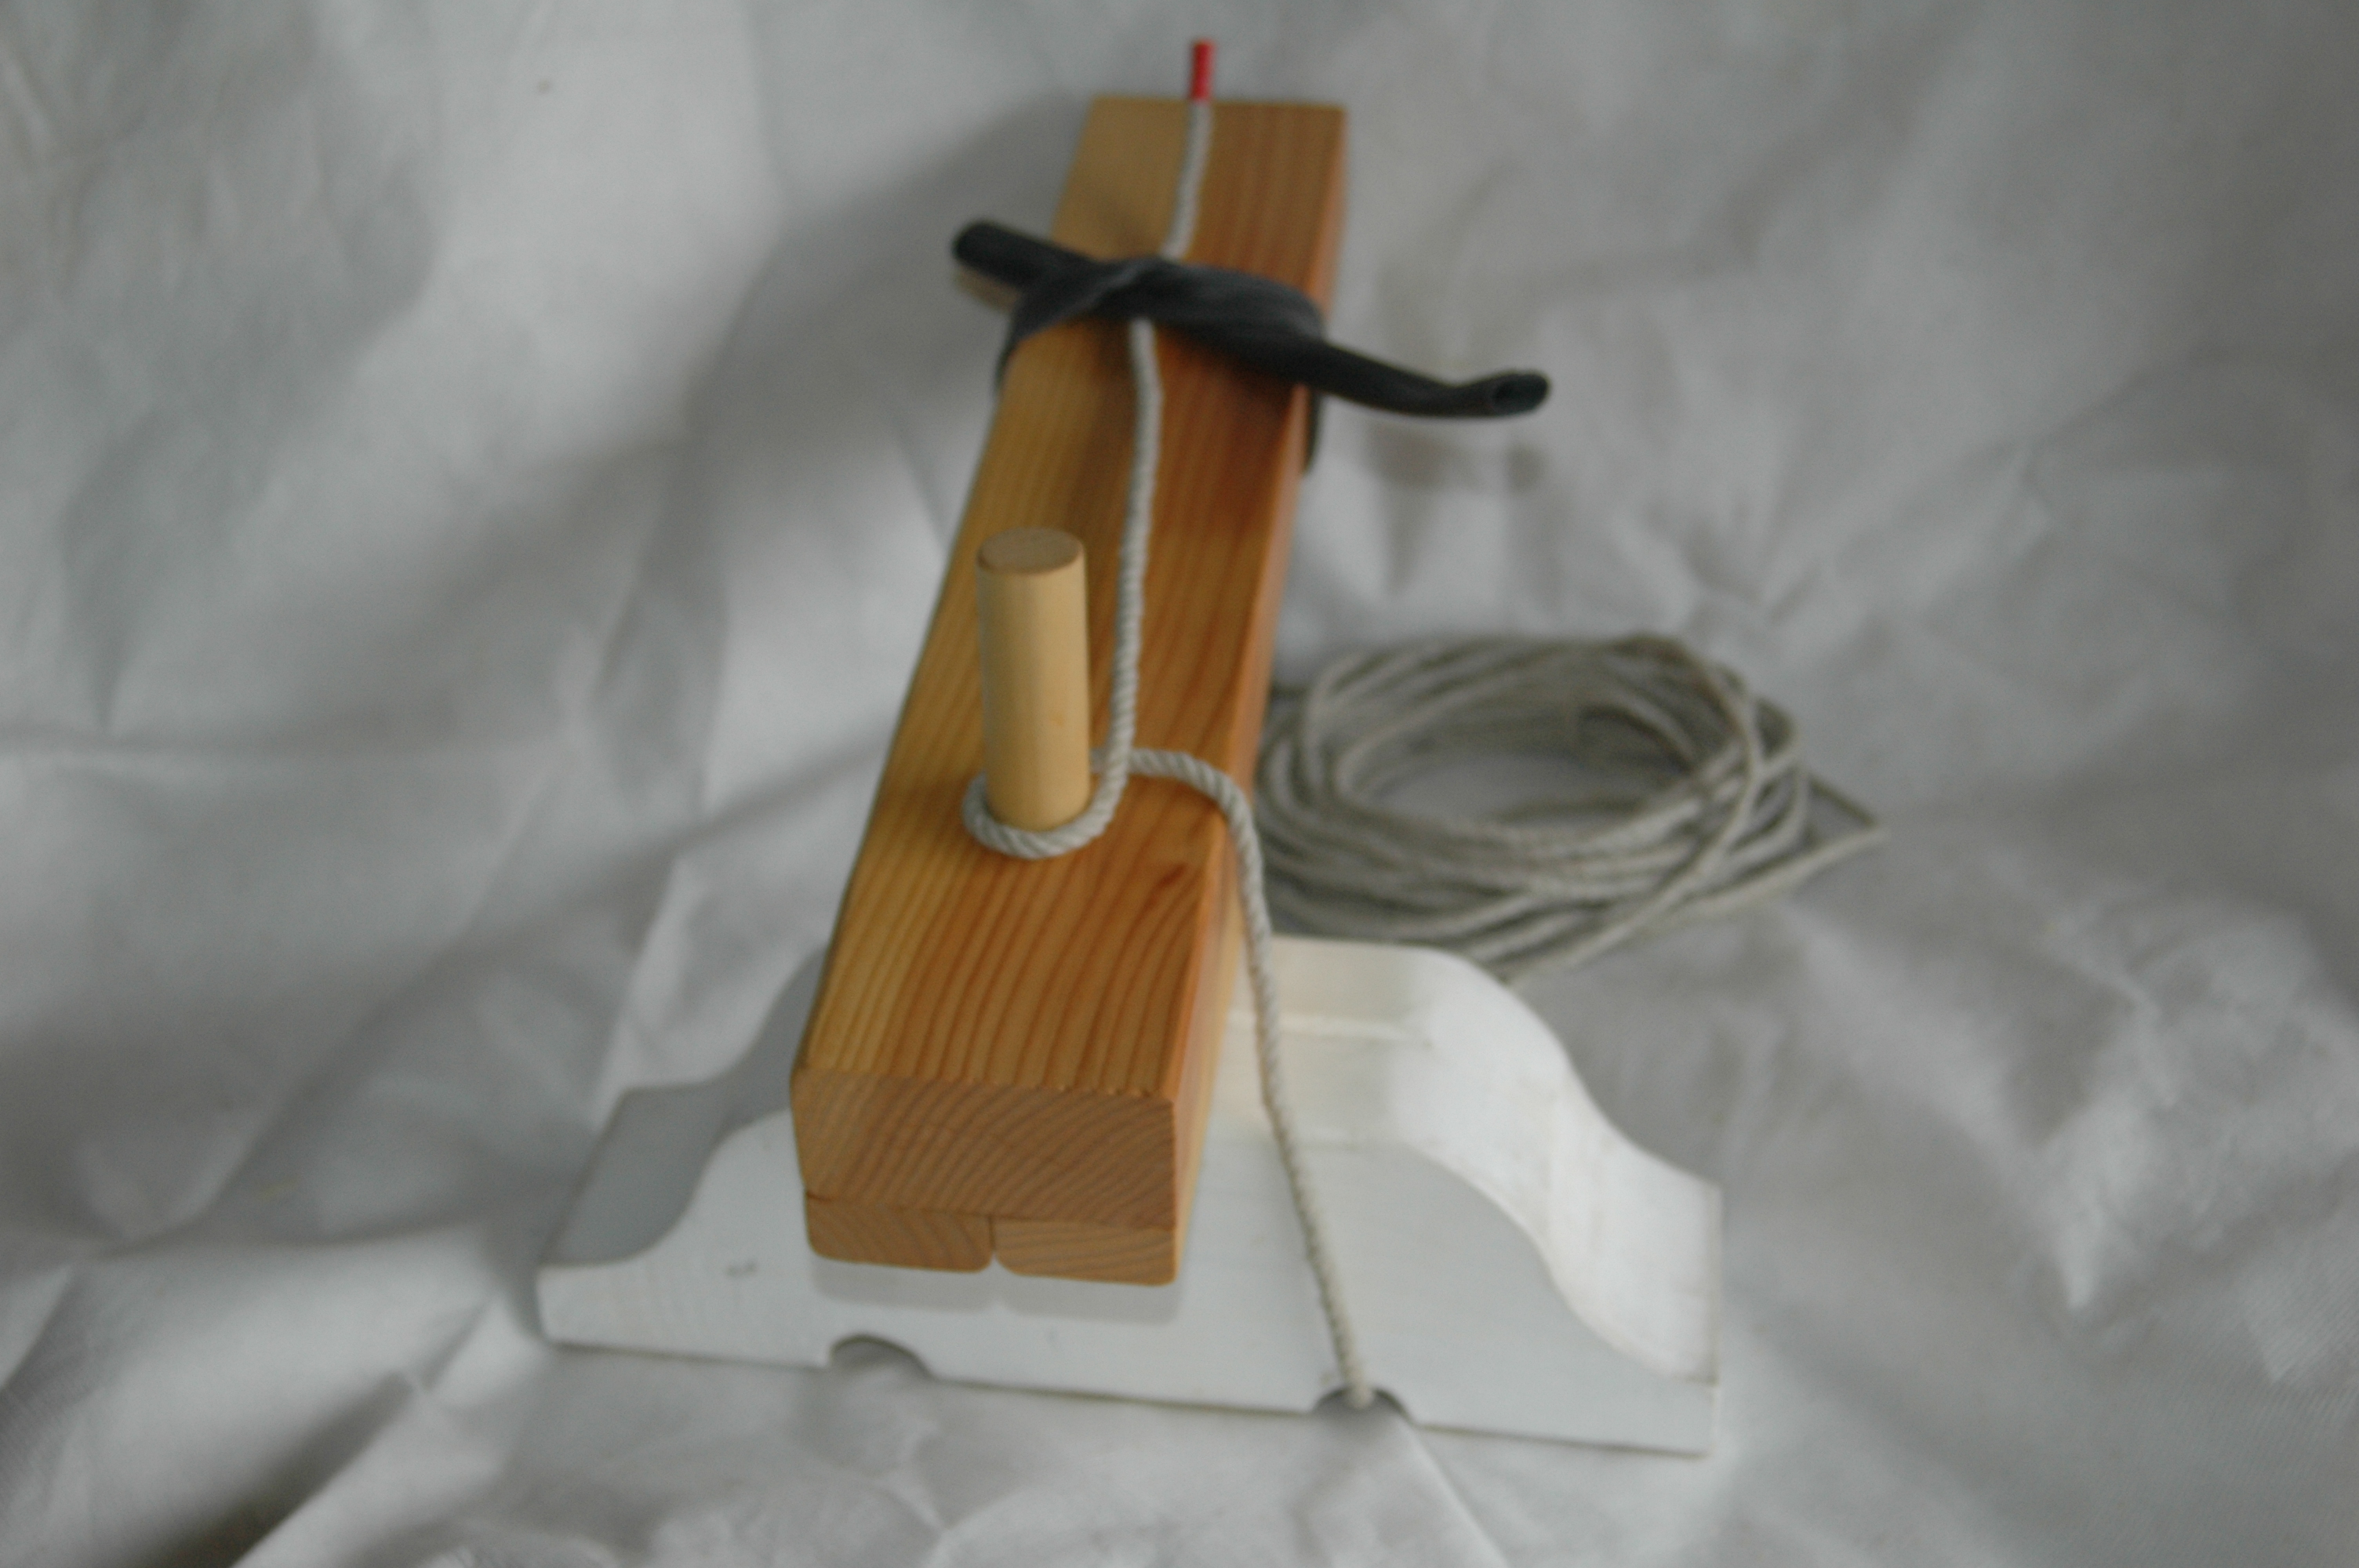
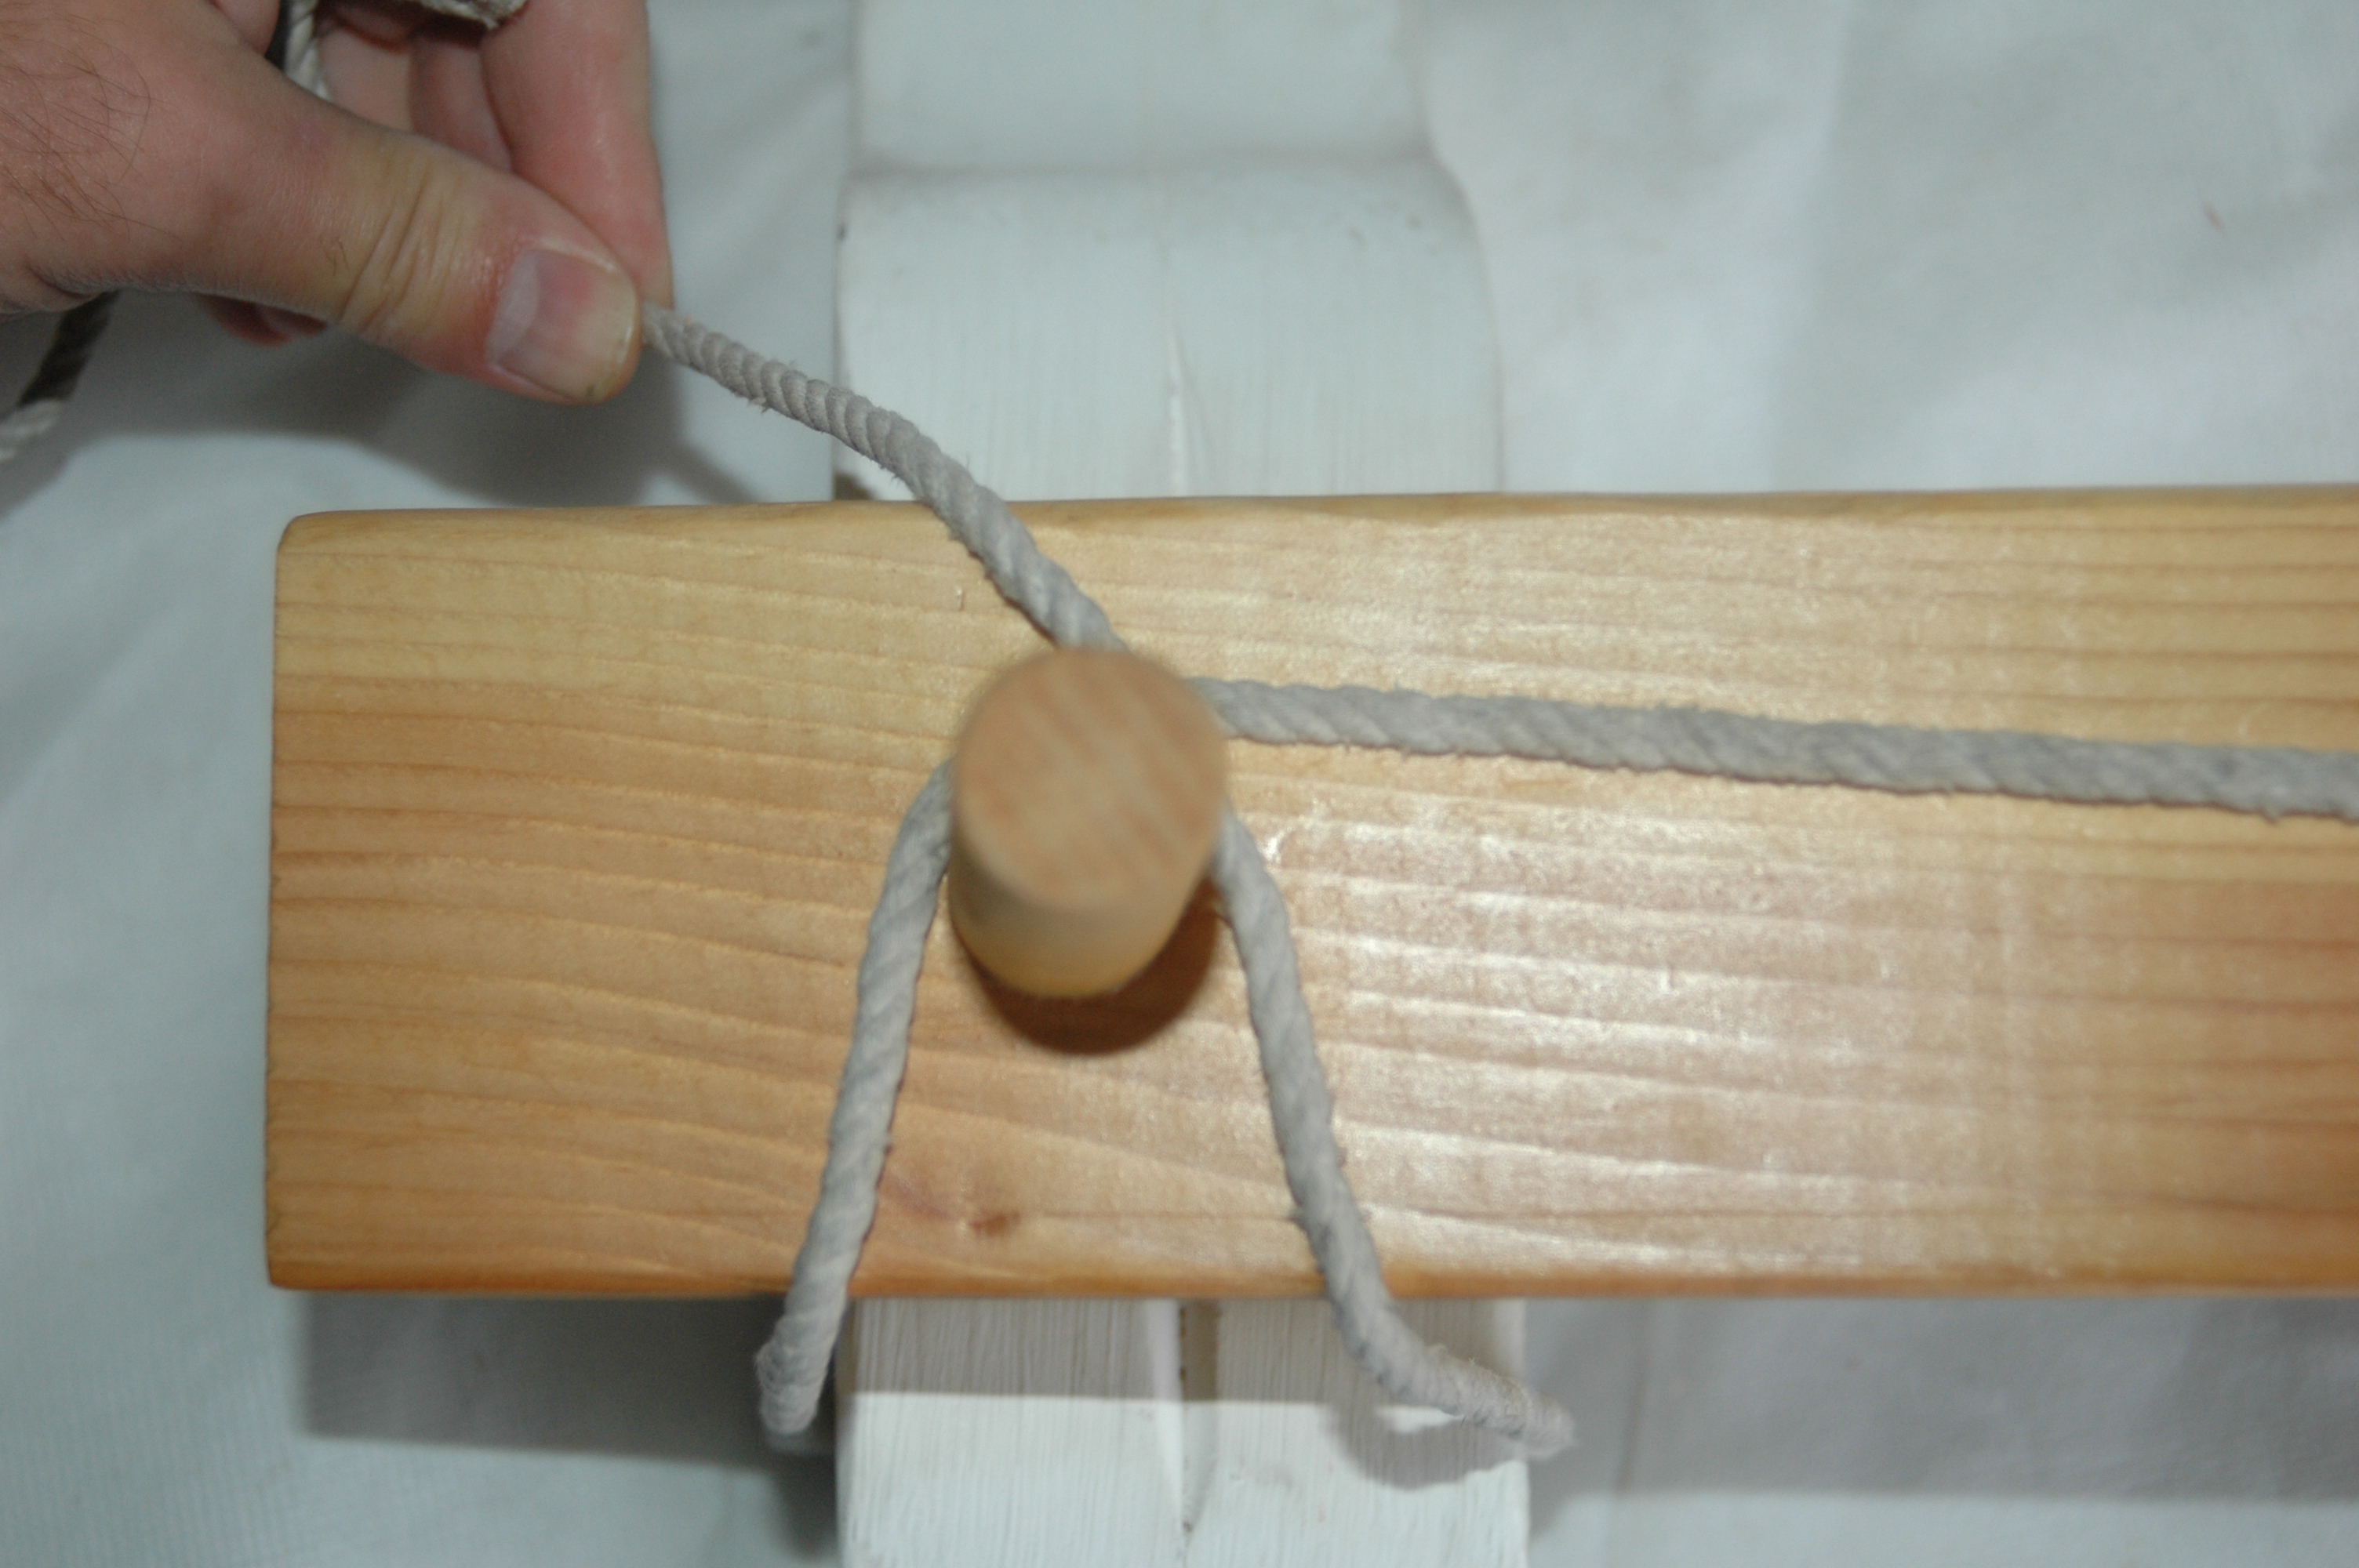
Before we begin we must make sure the iako is correctly positioned over the ama. Different canoes have different methods for accomplishing this from no help at all, to a small slot that fits into a groove, to an actual peg that goes into a hole in the top of the ama. There should always be a pad between the ama and iako for cushioning. For the practice jig you can center the peg over the groove in the simulated ama.
We begin by passing what will be our fixed end of the cord from the rear canoe facing ama hole through to the outer hole and then up over the iako past the peg and down the top of the iako for about 12 inches beyond the peg. This end stays put for the time being and you may want to stick it there with some tape or a strip of rubber. Alternately you can begin from the spot 12 inches behind the peg but this will make you pull a length of cord through the rear ama hole once initially that you could have avoided.
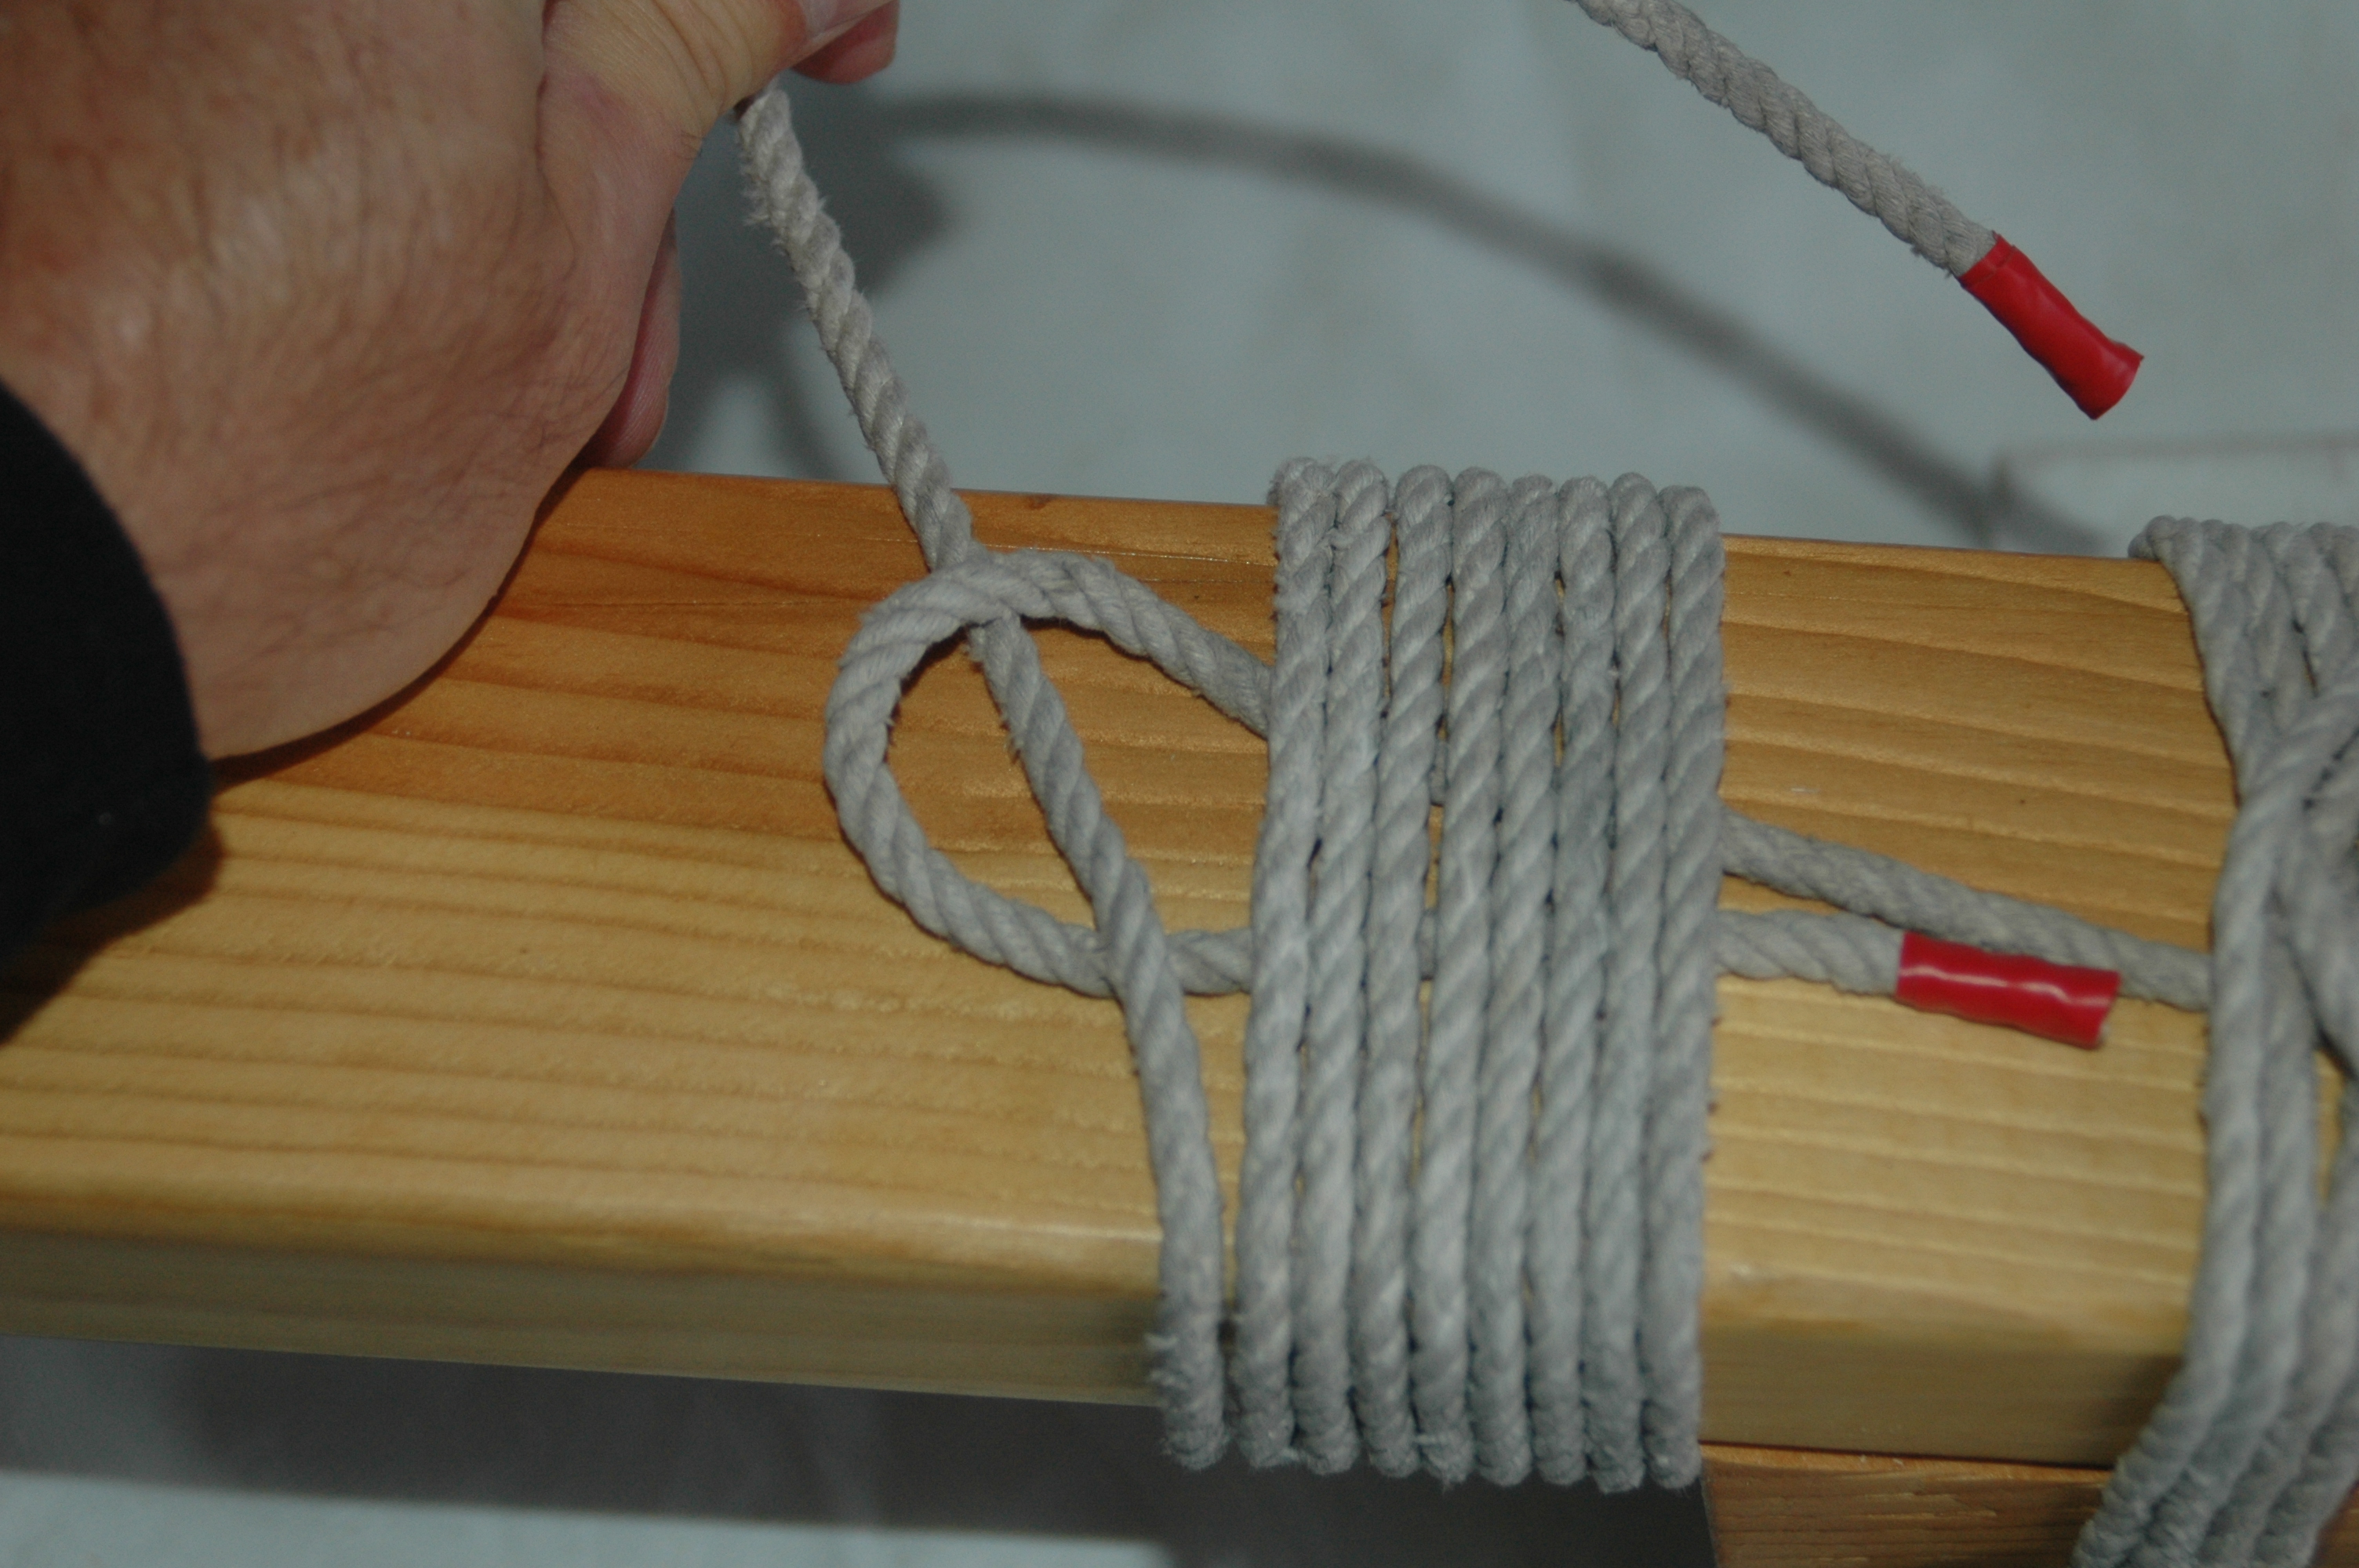
There are two kinds of riggers in the world; those who take one turn around the peg at this step and those who don’t. Taking a turn around the peg does not add any strength, but can add a little tension over the cord that can make getting started easier.

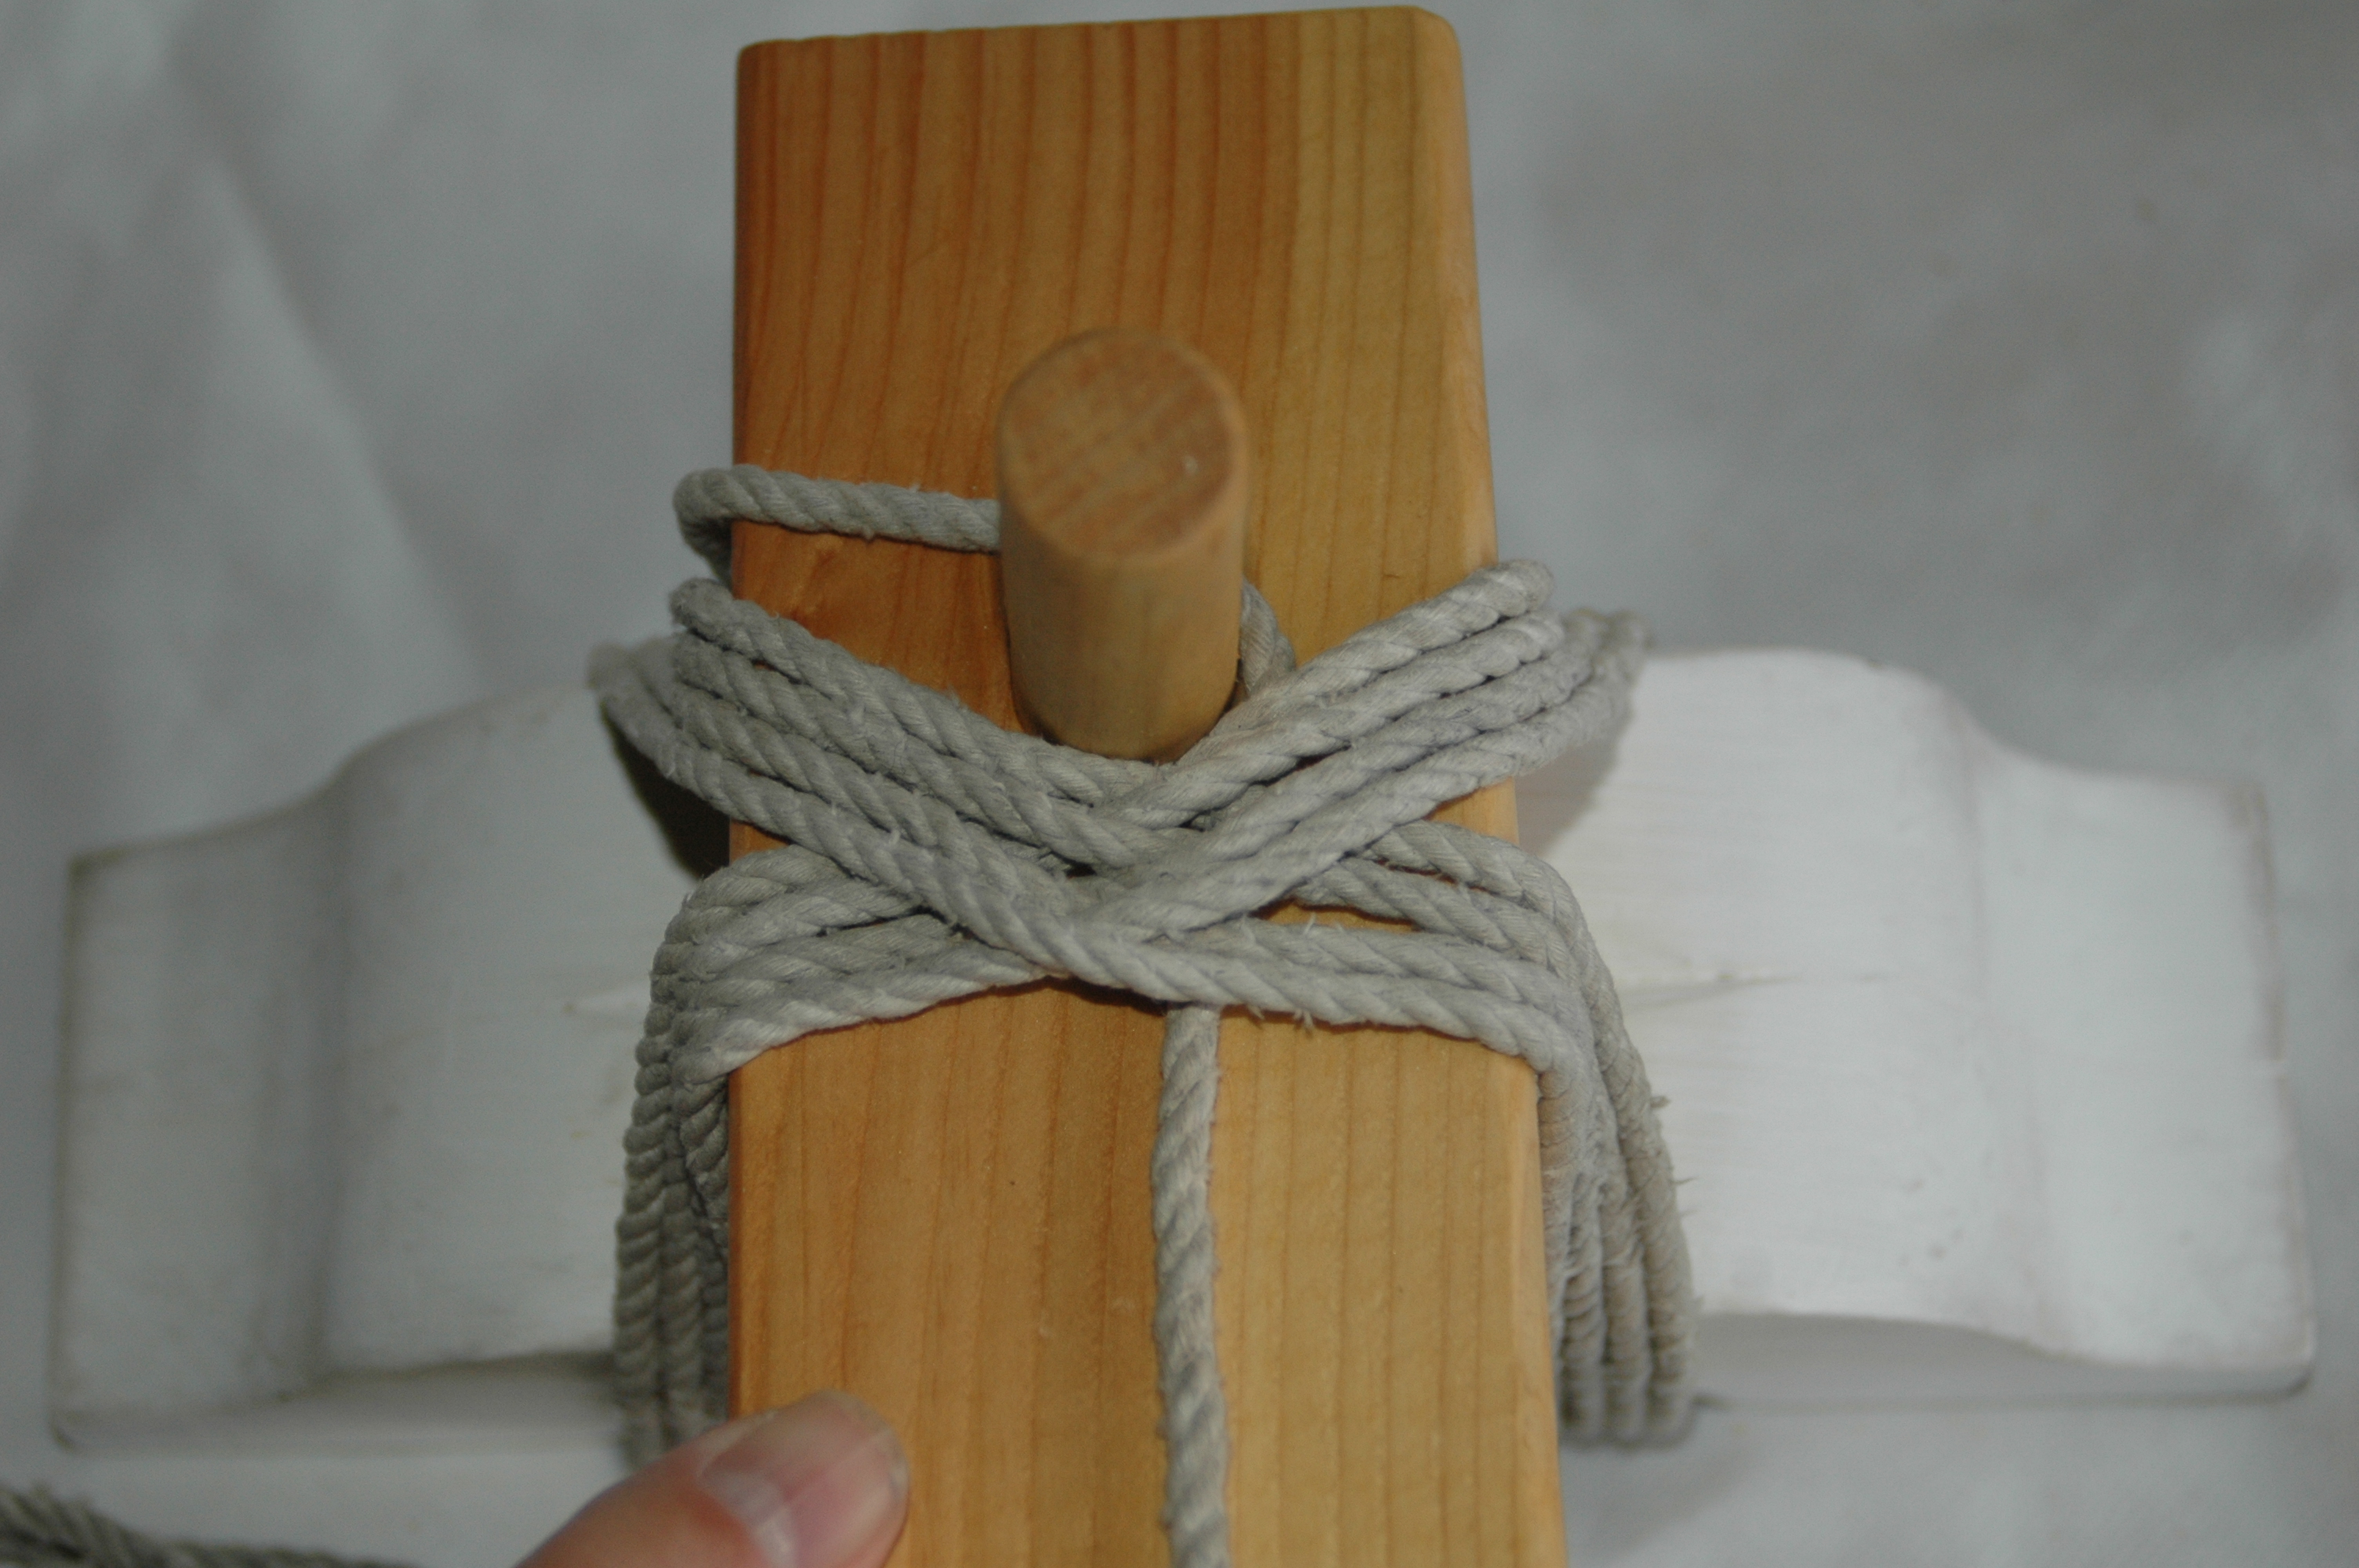
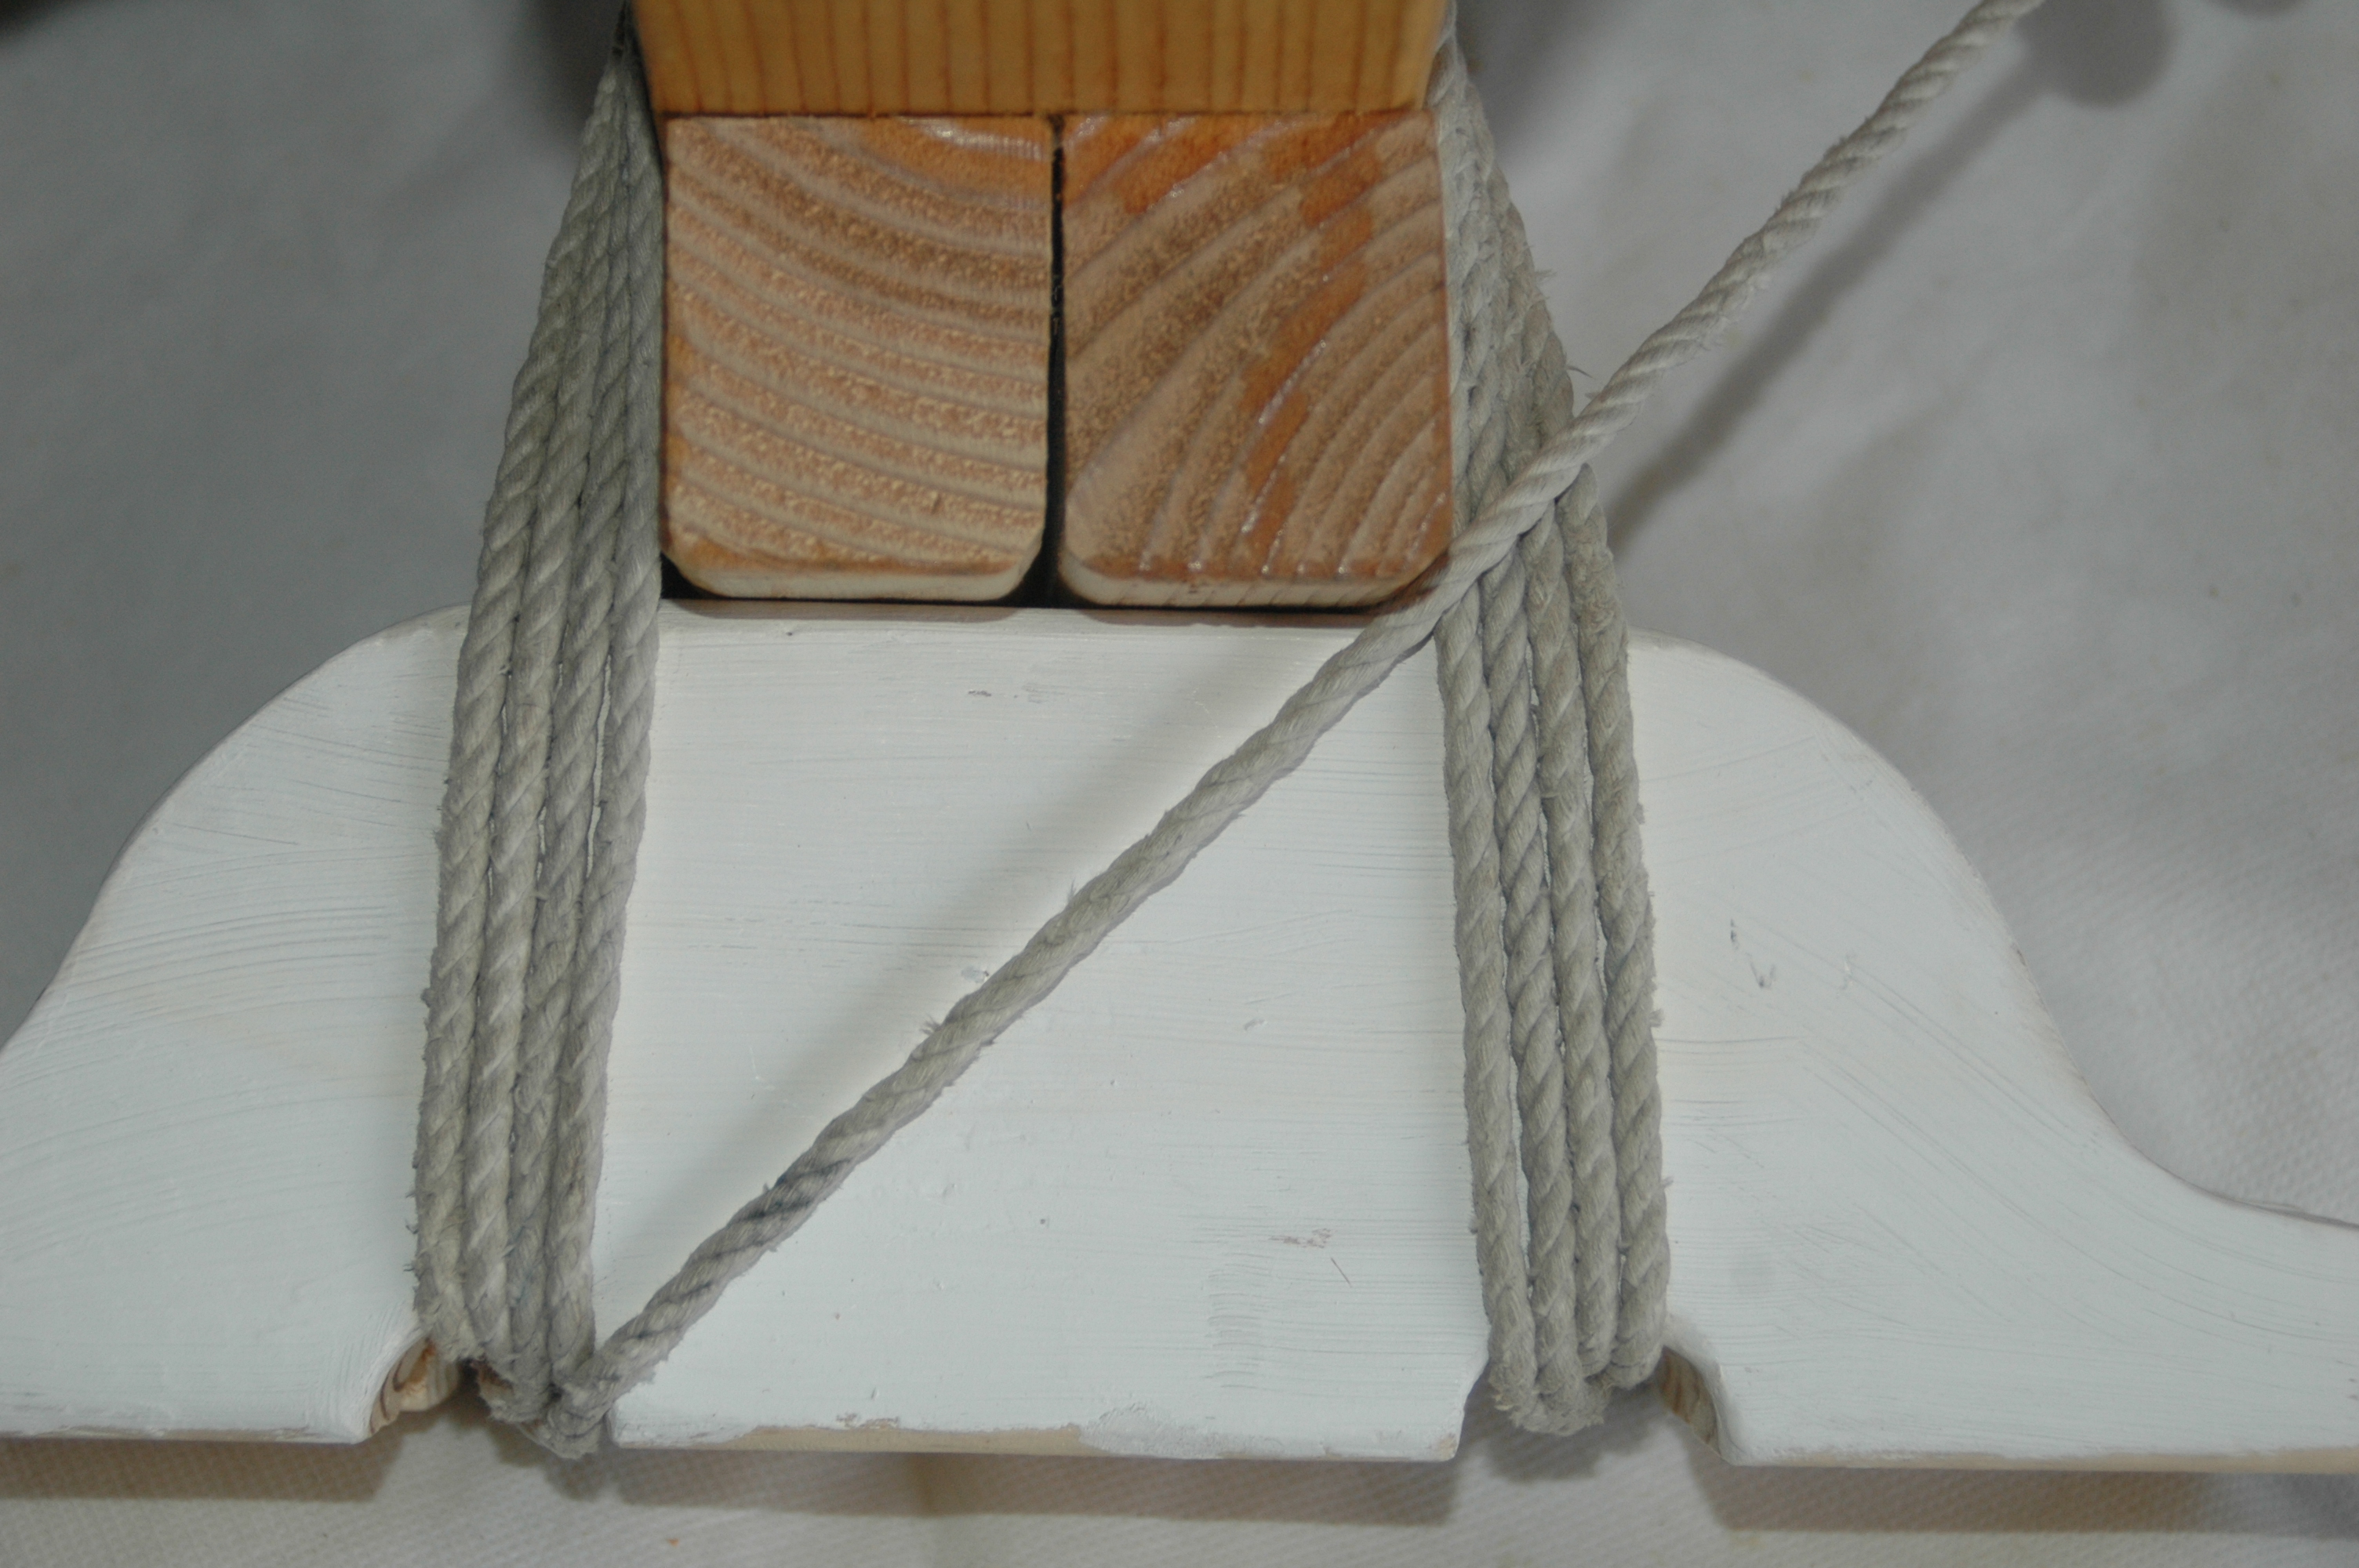
Now we turn our attention to the running end of the cord. This will be pulled tight at every step in the process. Pulling the cord tight can be done by wrapping the cord around a pulling dowel or using gloves. When pulling tight you want to brace yourself against the ama using your knee or foot, pulling with straight arms using your big muscles. Having your helper hold pressure on the cord while you re-position can be very helpful. When pulling tight from the canoe facing holes always pull to the outside of the hole (away from the iako) then lock it in by moving the cord over to the inside of the hole. This is a critical step. Moving the cord to the inside of the hole positions you to lay the next wrap parallel to the last. Doing so on each pass makes the cord cross over itself inside the hole. With the training jig you can see this since you can see inside the ‘hole’.
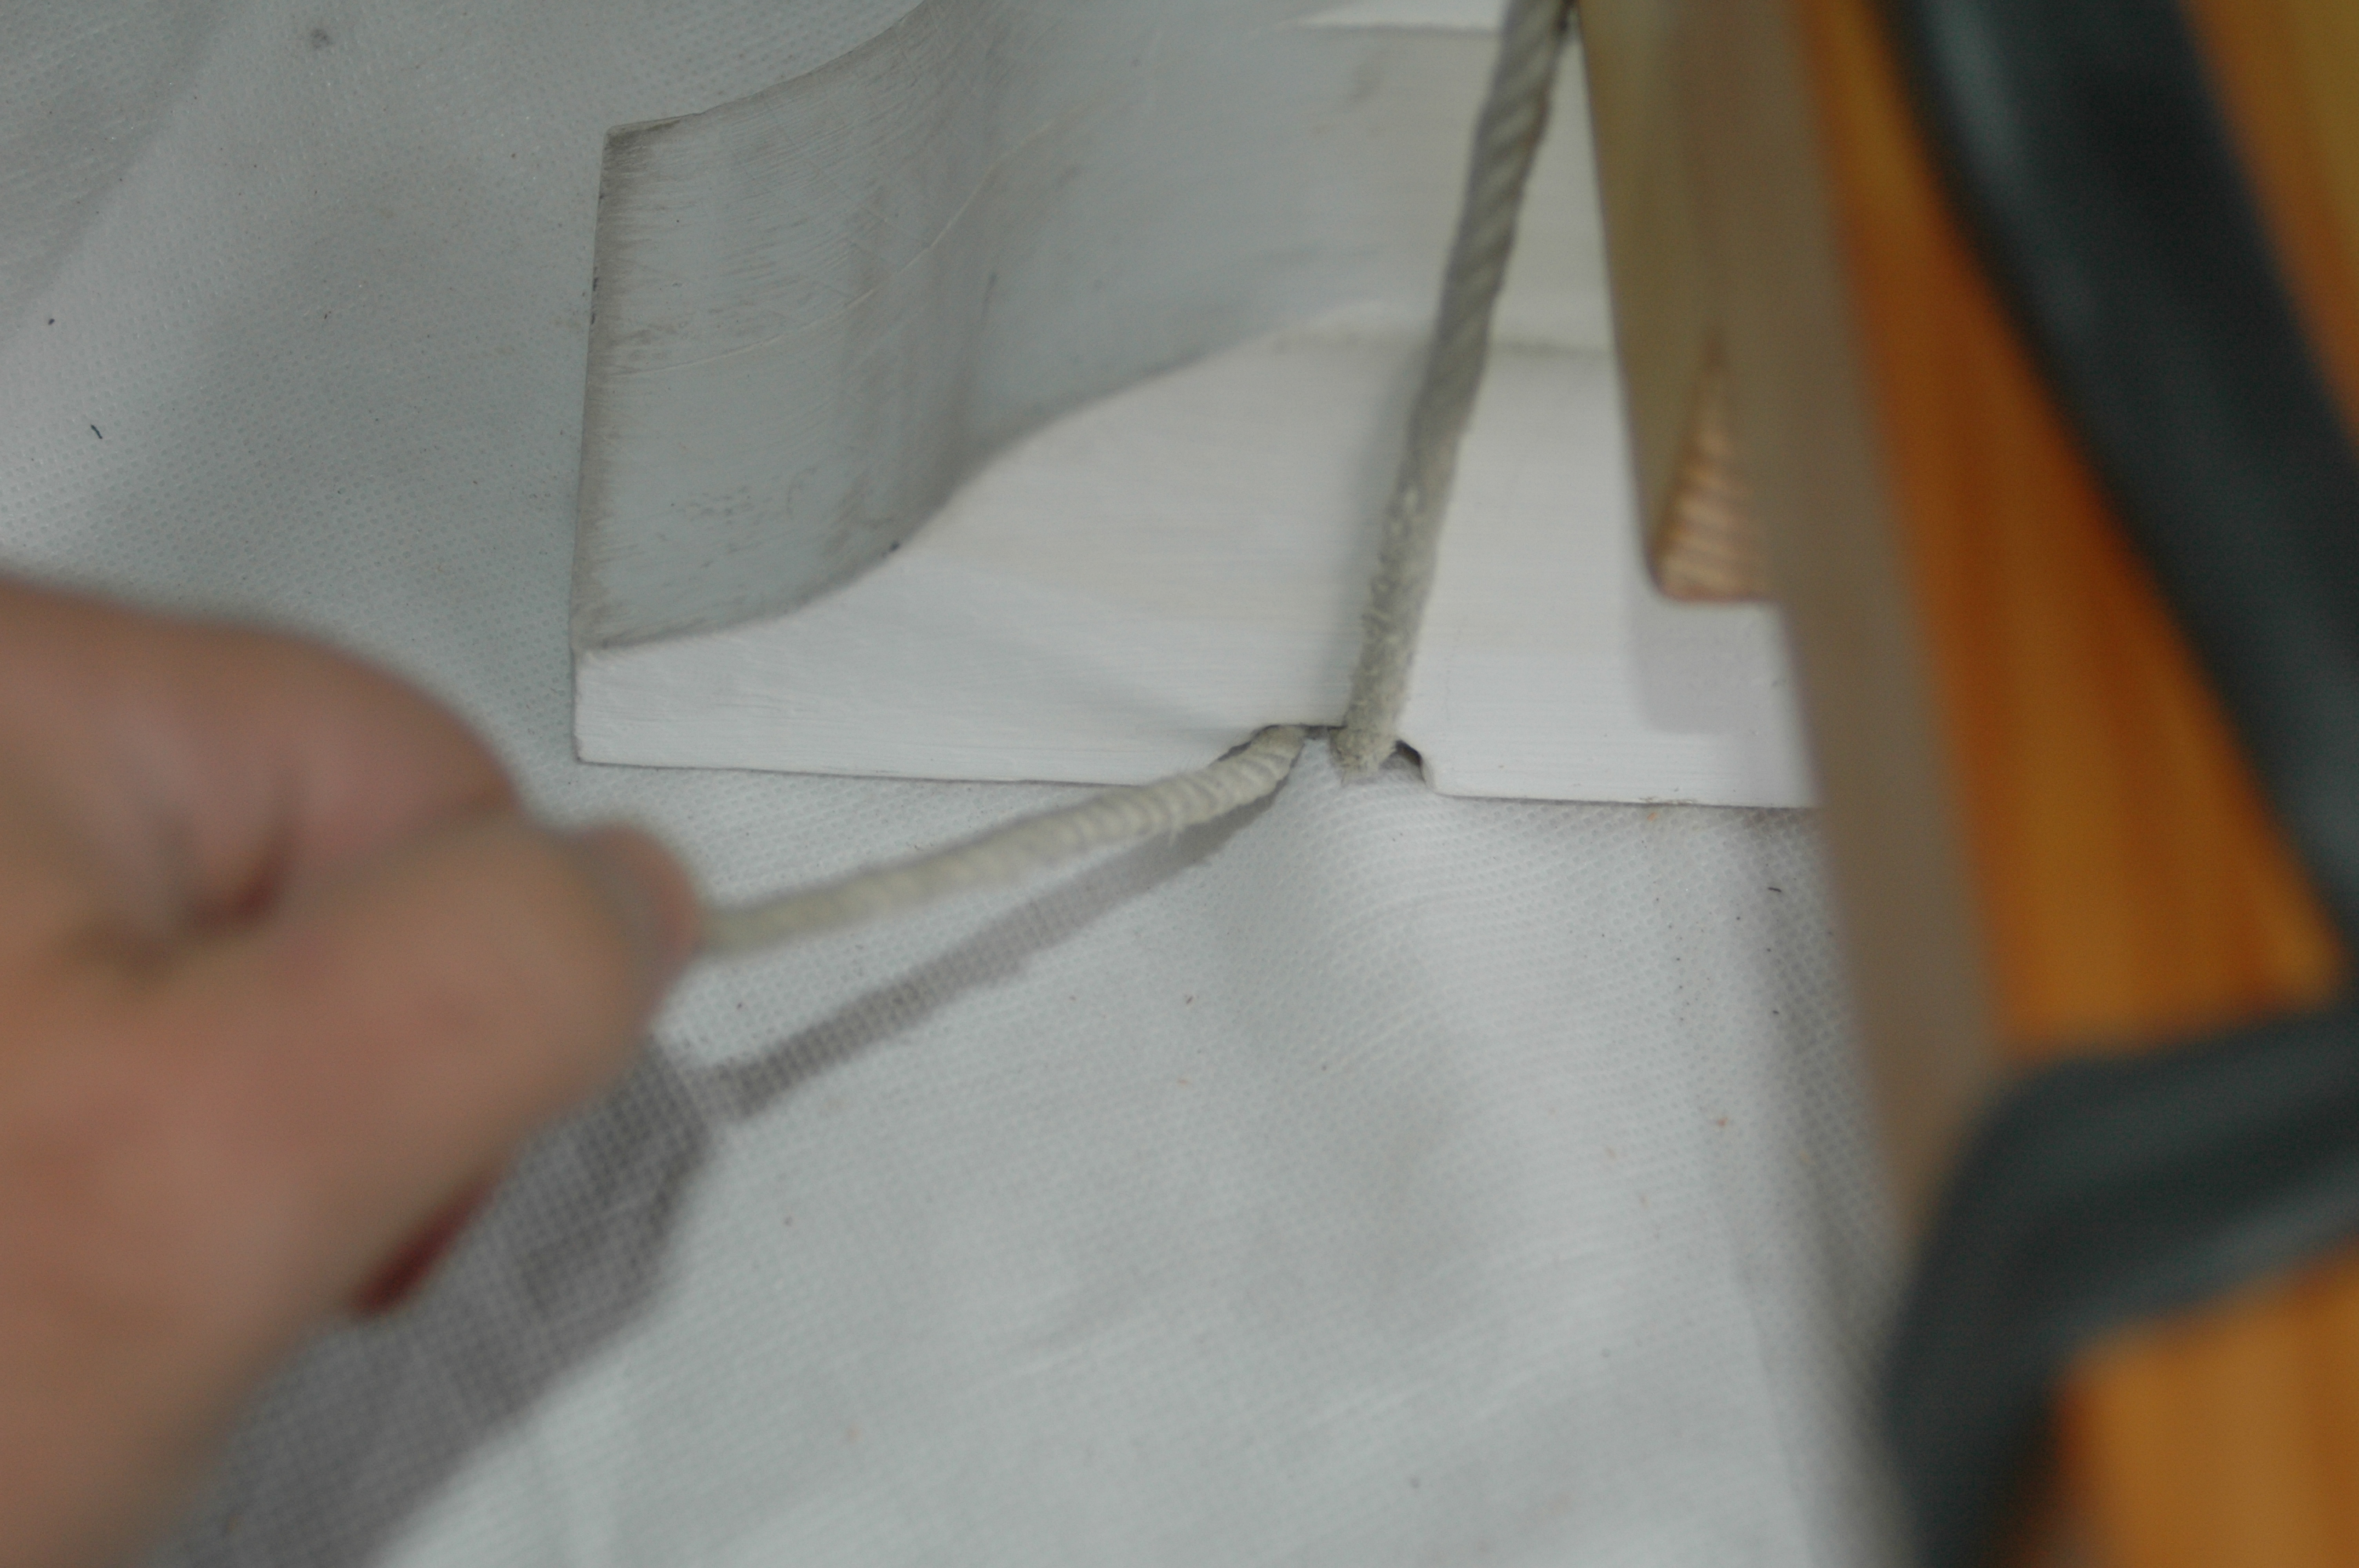
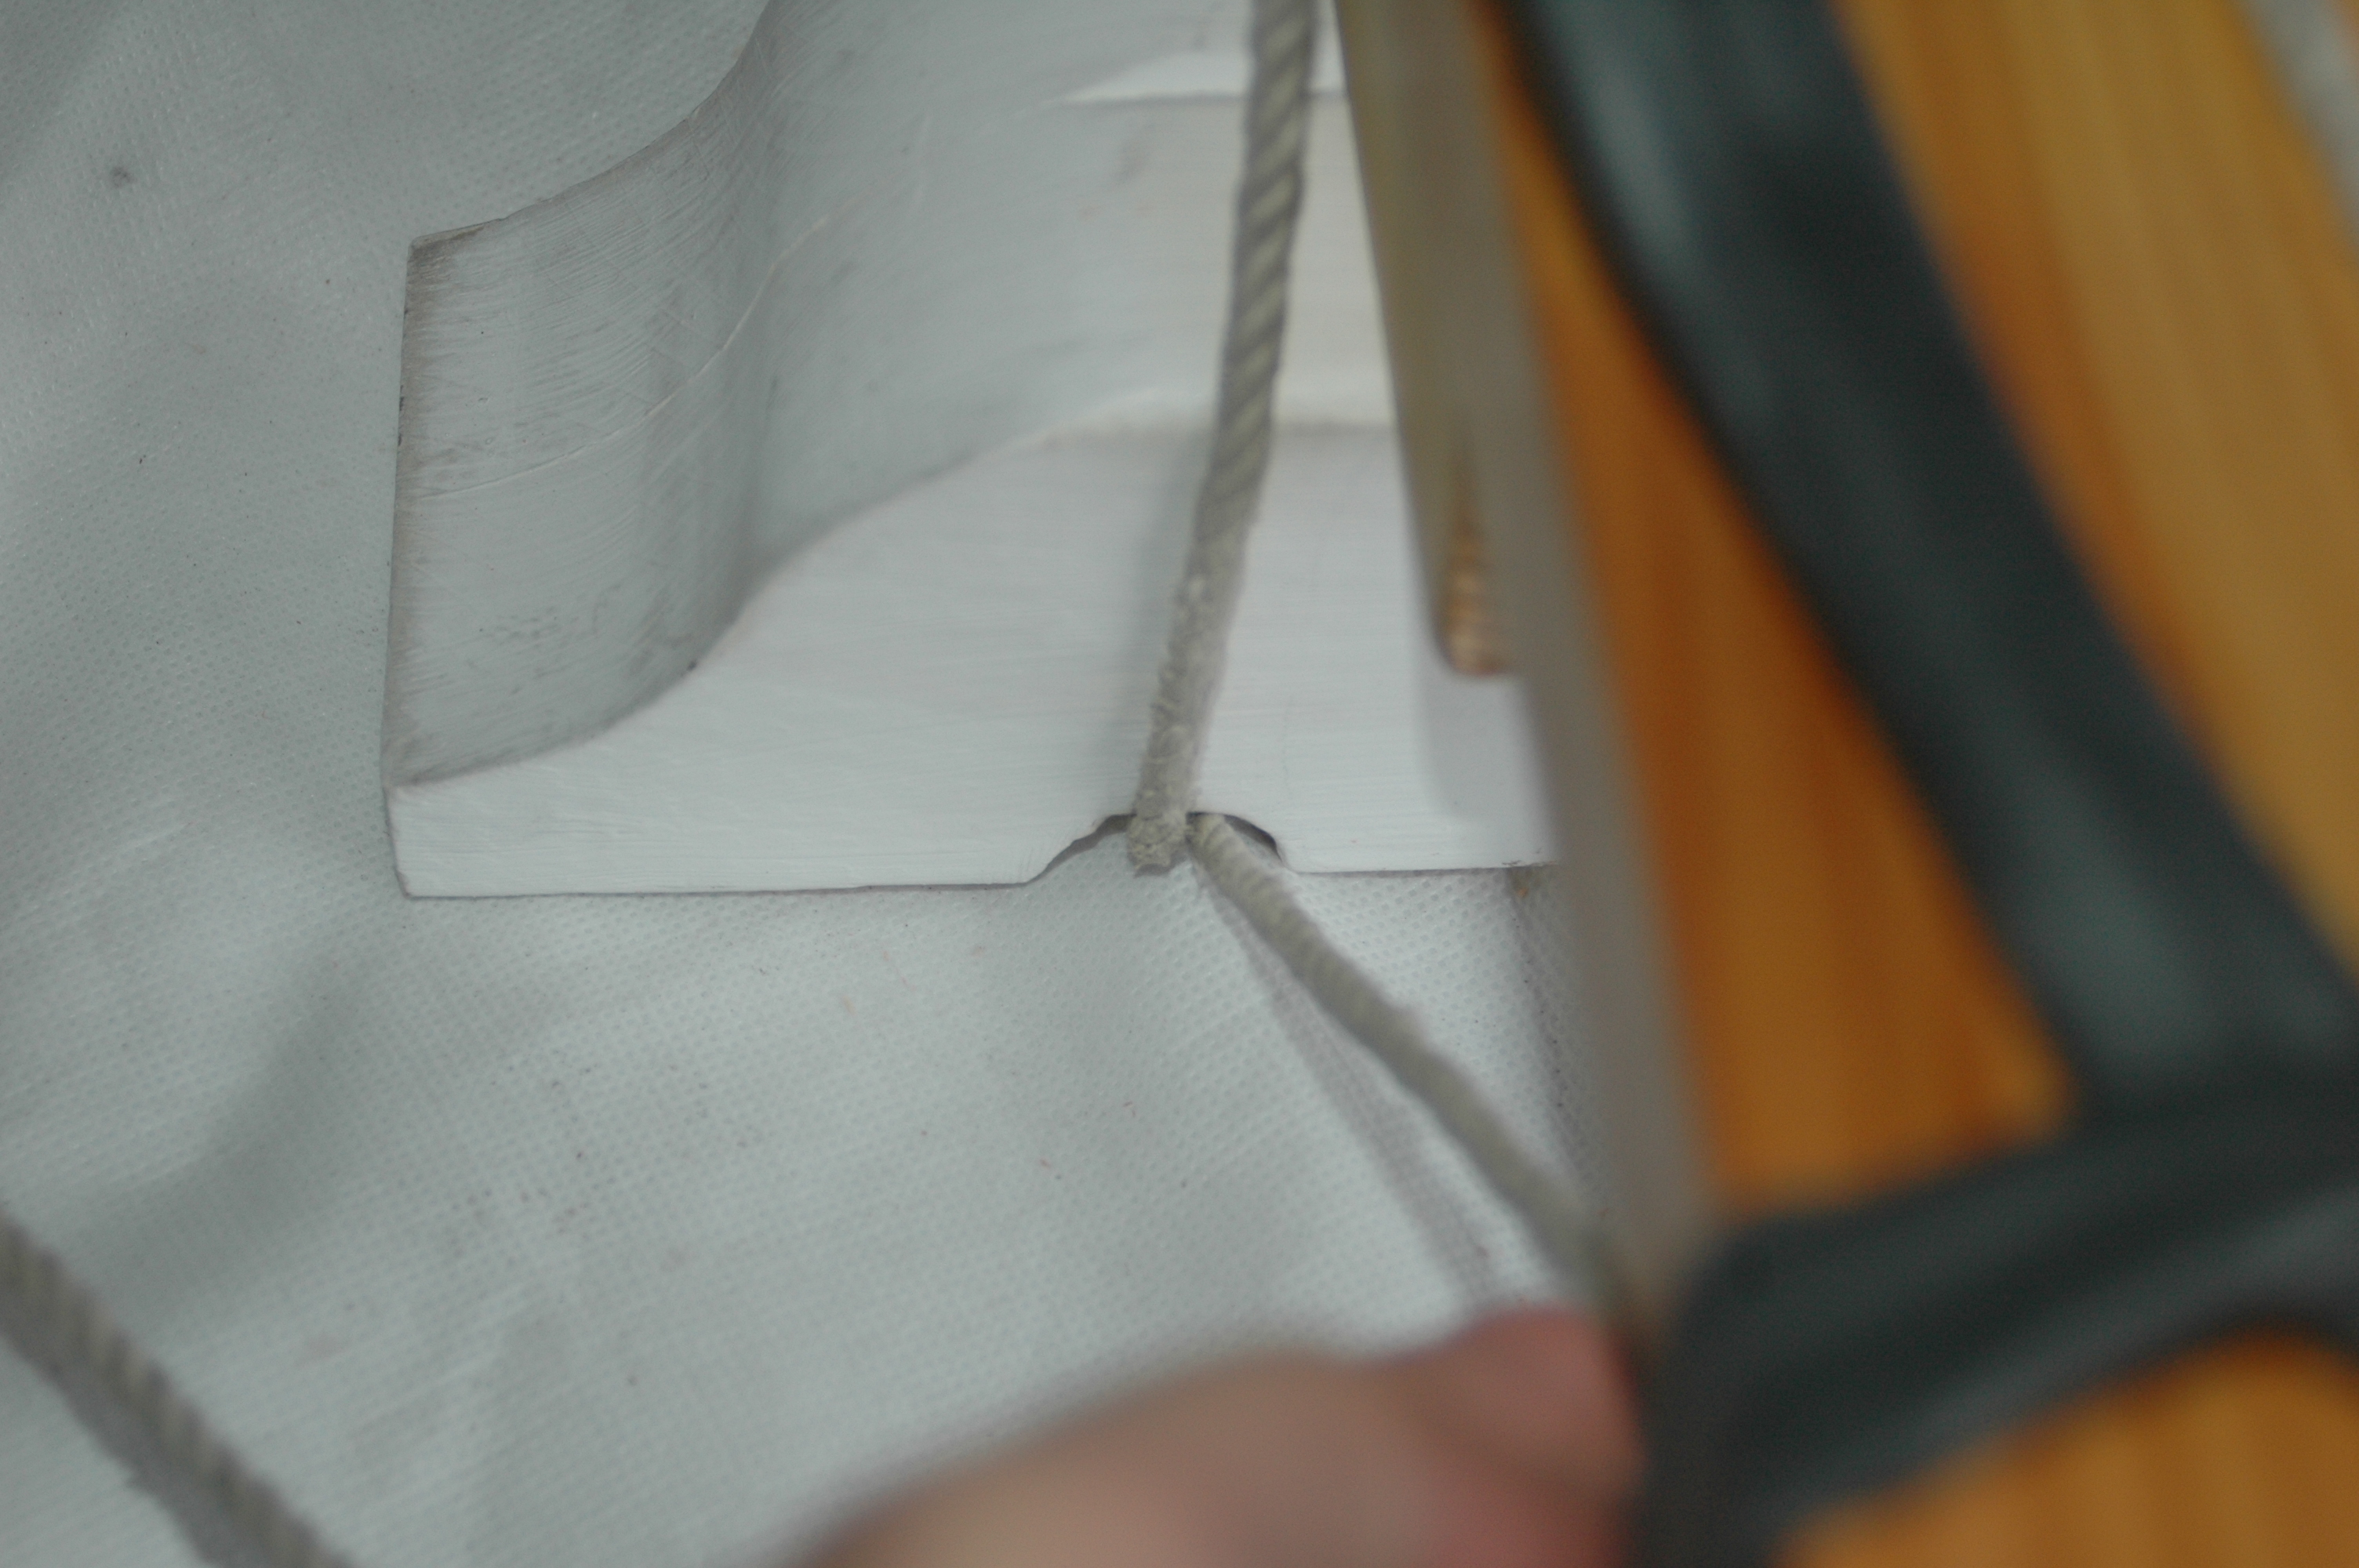
Once locked into the inside of the hole, pass the cord up over the top of the iako being careful to lay each wrap flat parallel to the last. The cord goes behind the peg, down to the outer ama hole on the opposite side. The full length of the running end must then be fed through the outside hole toward the canoe facing hole. Having your helper do this will speed up the process. On the training jig you don’t need to feed through as the ‘holes’ are open at the bottom. Repeat this process until you have laid four wraps of cord next to each other on all four corners of the iako. You should be exiting the front canoe facing ama hole at this point. Go one more time over the top of the iako behind the peg to the rear outside hole. This will look like you have an extra 5th wrap going into the rear outside hole, but we don’t count our initial fixed end length as being a wrap, so four regular wraps plus the starting one will be 5 parallel layers. This leaves the running end exiting the rear canoe facing hole.
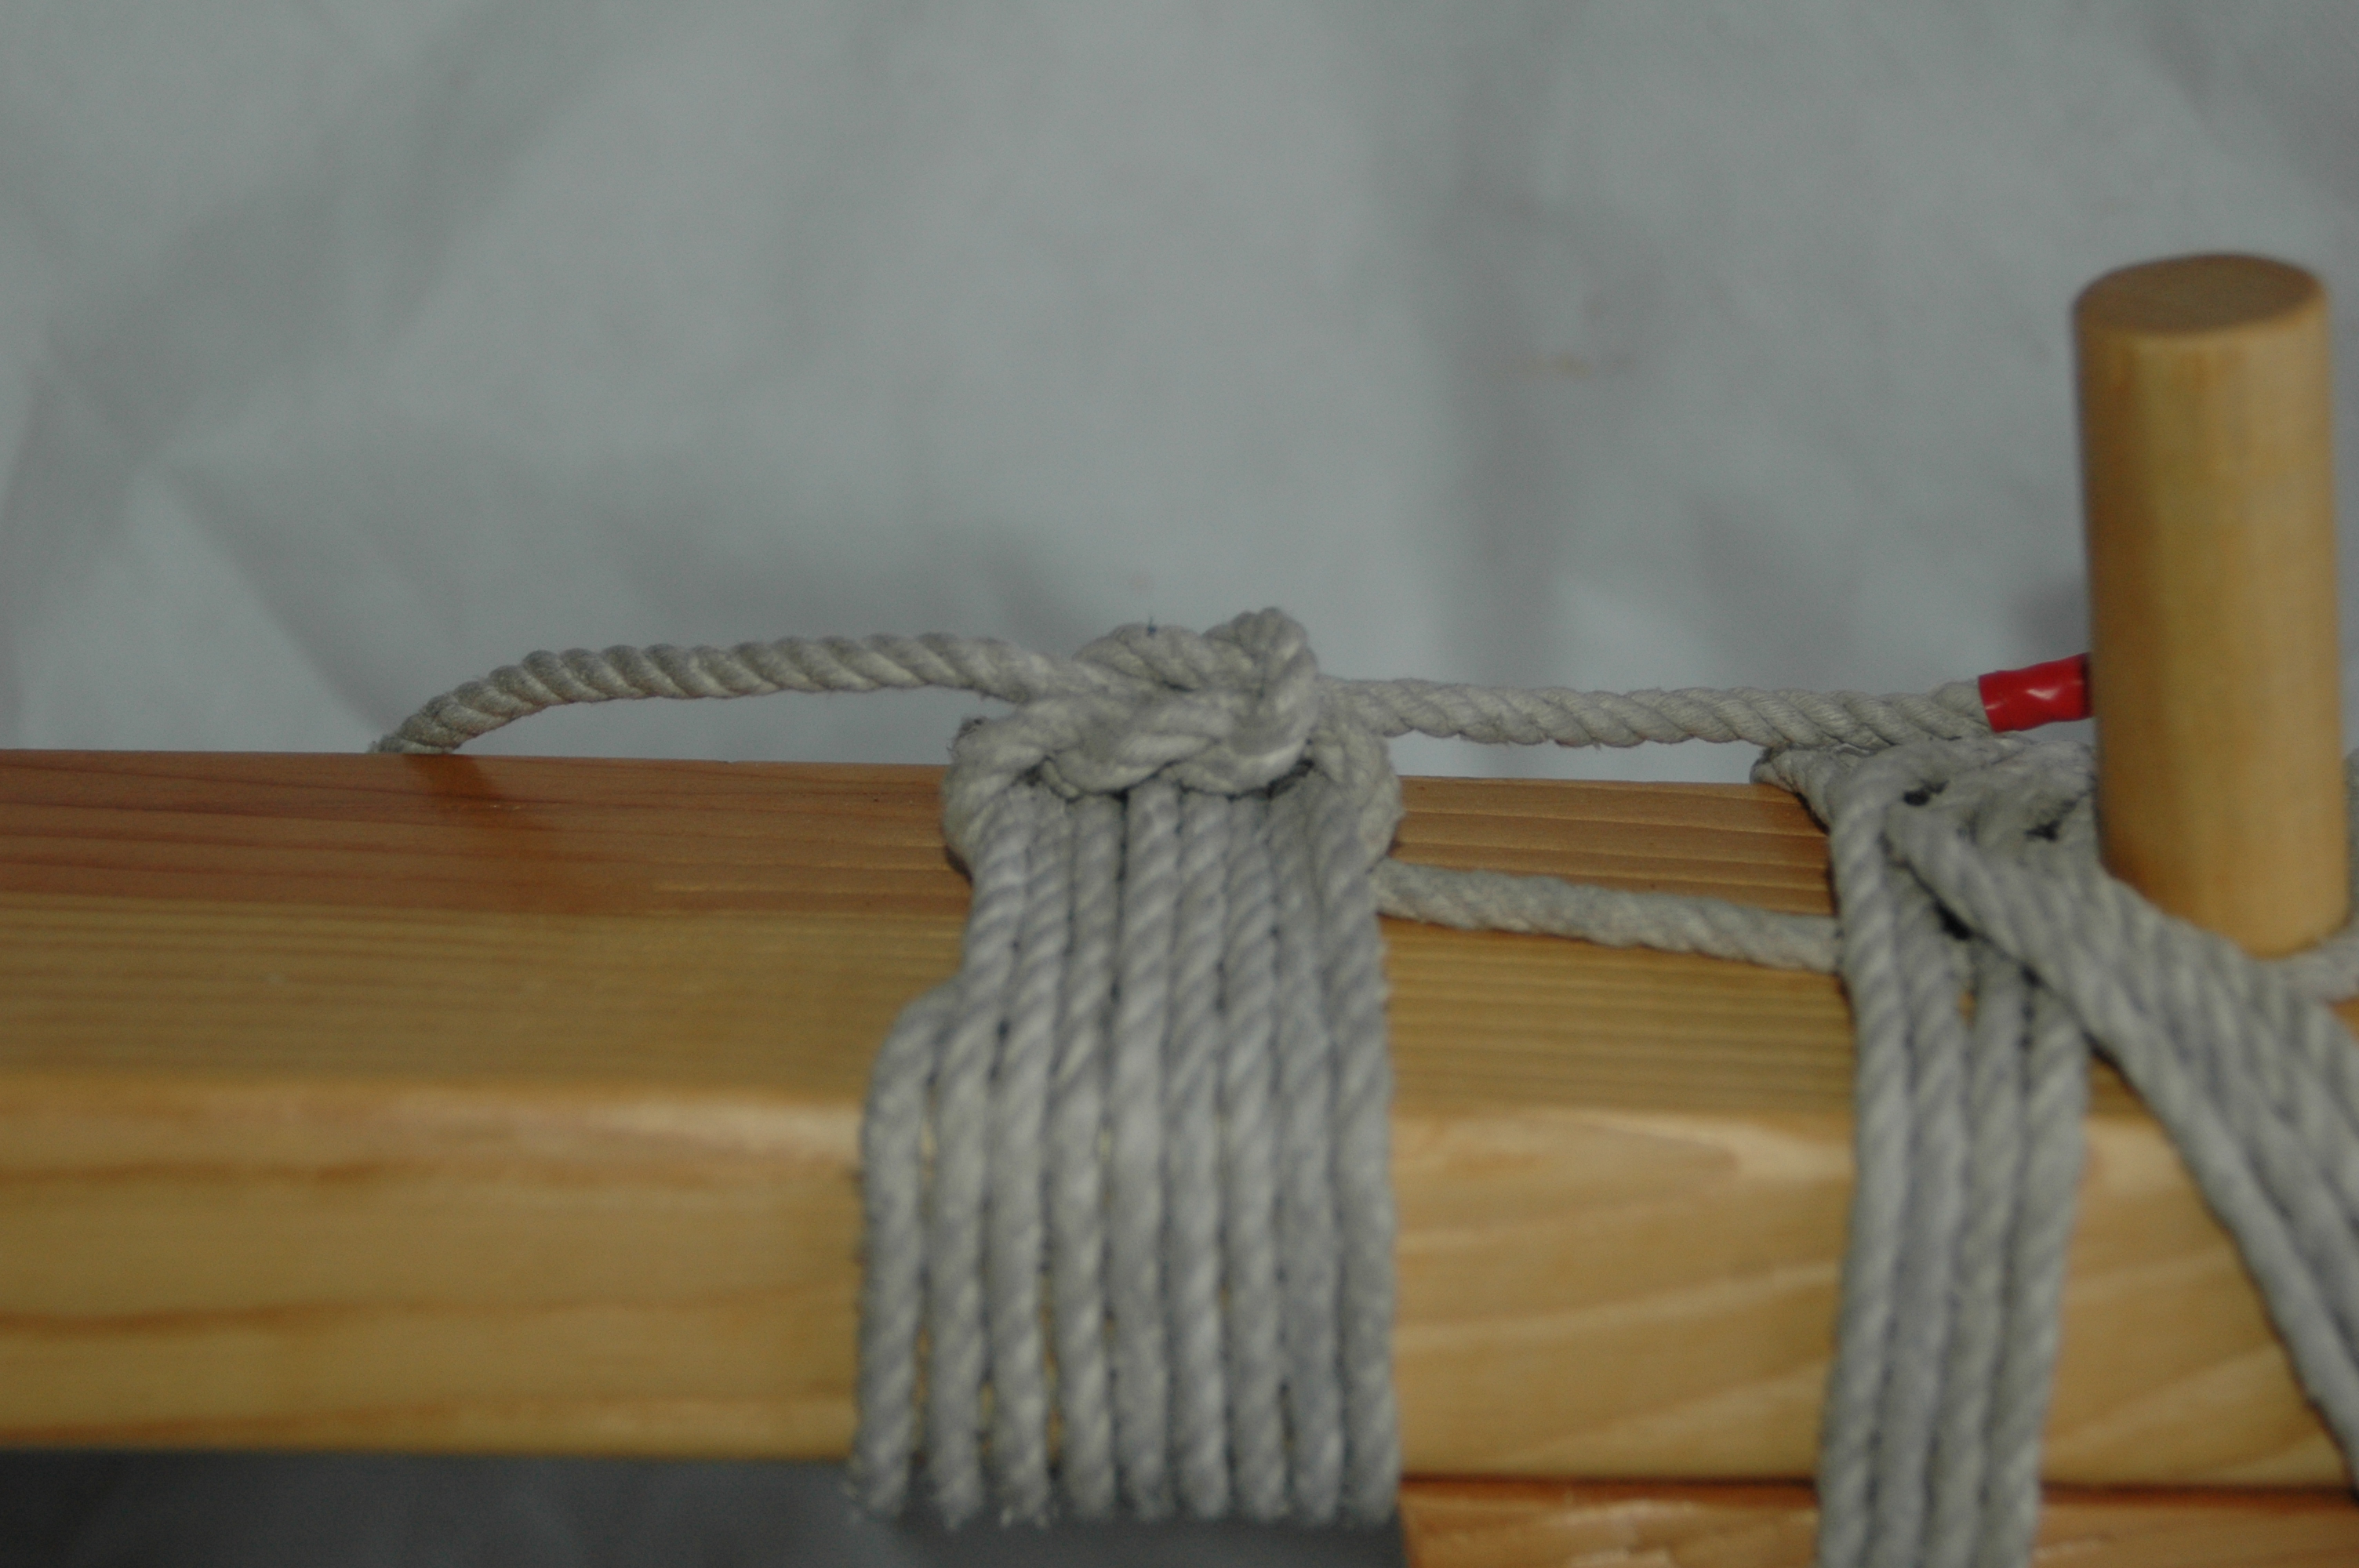
Frapping
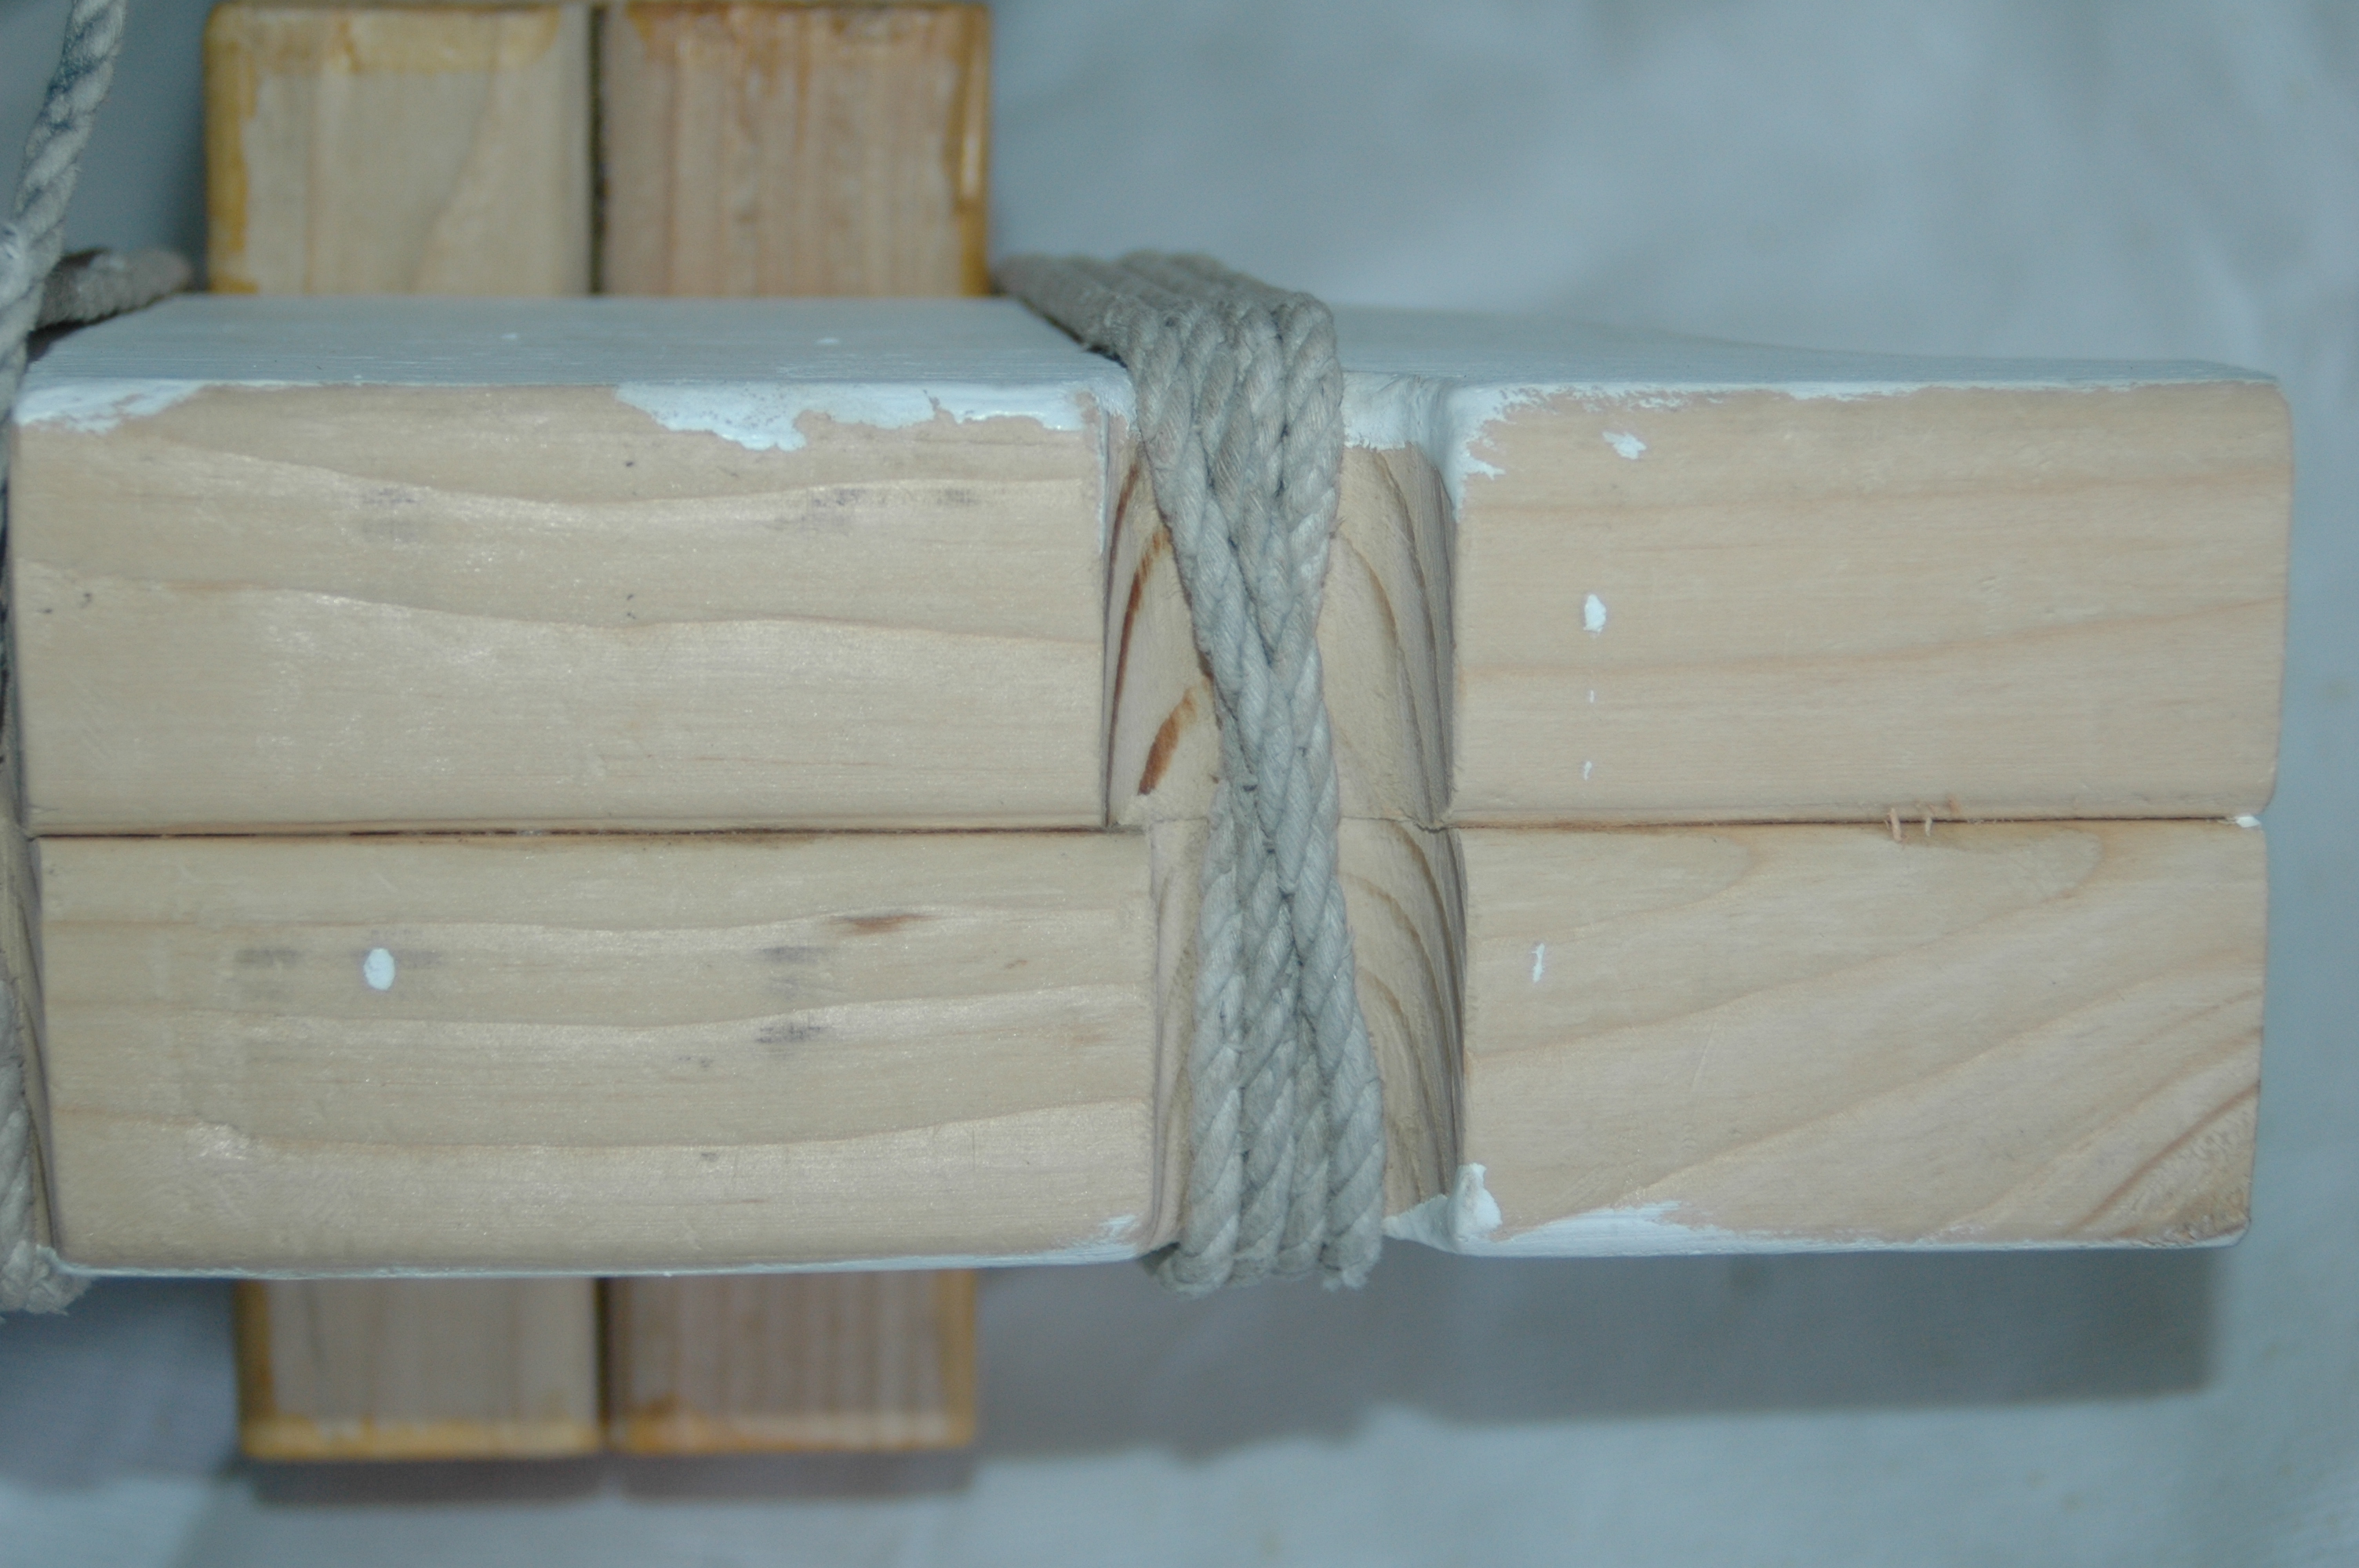
Frapping consists of wraps around our existing wraps horizontally at the junction of iako to ama to further tighten them. To get the cord into position from the rear canoe facing hole bring the cord up diagonally from the inside ‘locked’ position of the hole to the top of the ama in front of the iako. Wrap the cord around four times pulling tight each time. Each layer of cord should be below so as to lock in the cordage. As each wrap is applied, it snugs the wraps firmly against the underside of the iako.

Finishing Off
At this point you will need to ‘un-stick’ the fixed end of the cord and make it do a U turn back against itself down the iako facing out toward the peg. Have your helper do this and hold it while you work the running end of the cord. The remainder of the running end is wrapped around the iako, over the top of fixed end U turn, working towards the U of the U turn. When you have about 6 or so inches left of the running end, pass it through the U of the fixed end. Pull the fixed end (now poking out from your iako wraps) until it draws the U turn, pulling the running end along with it, half the distance under the iako wraps.

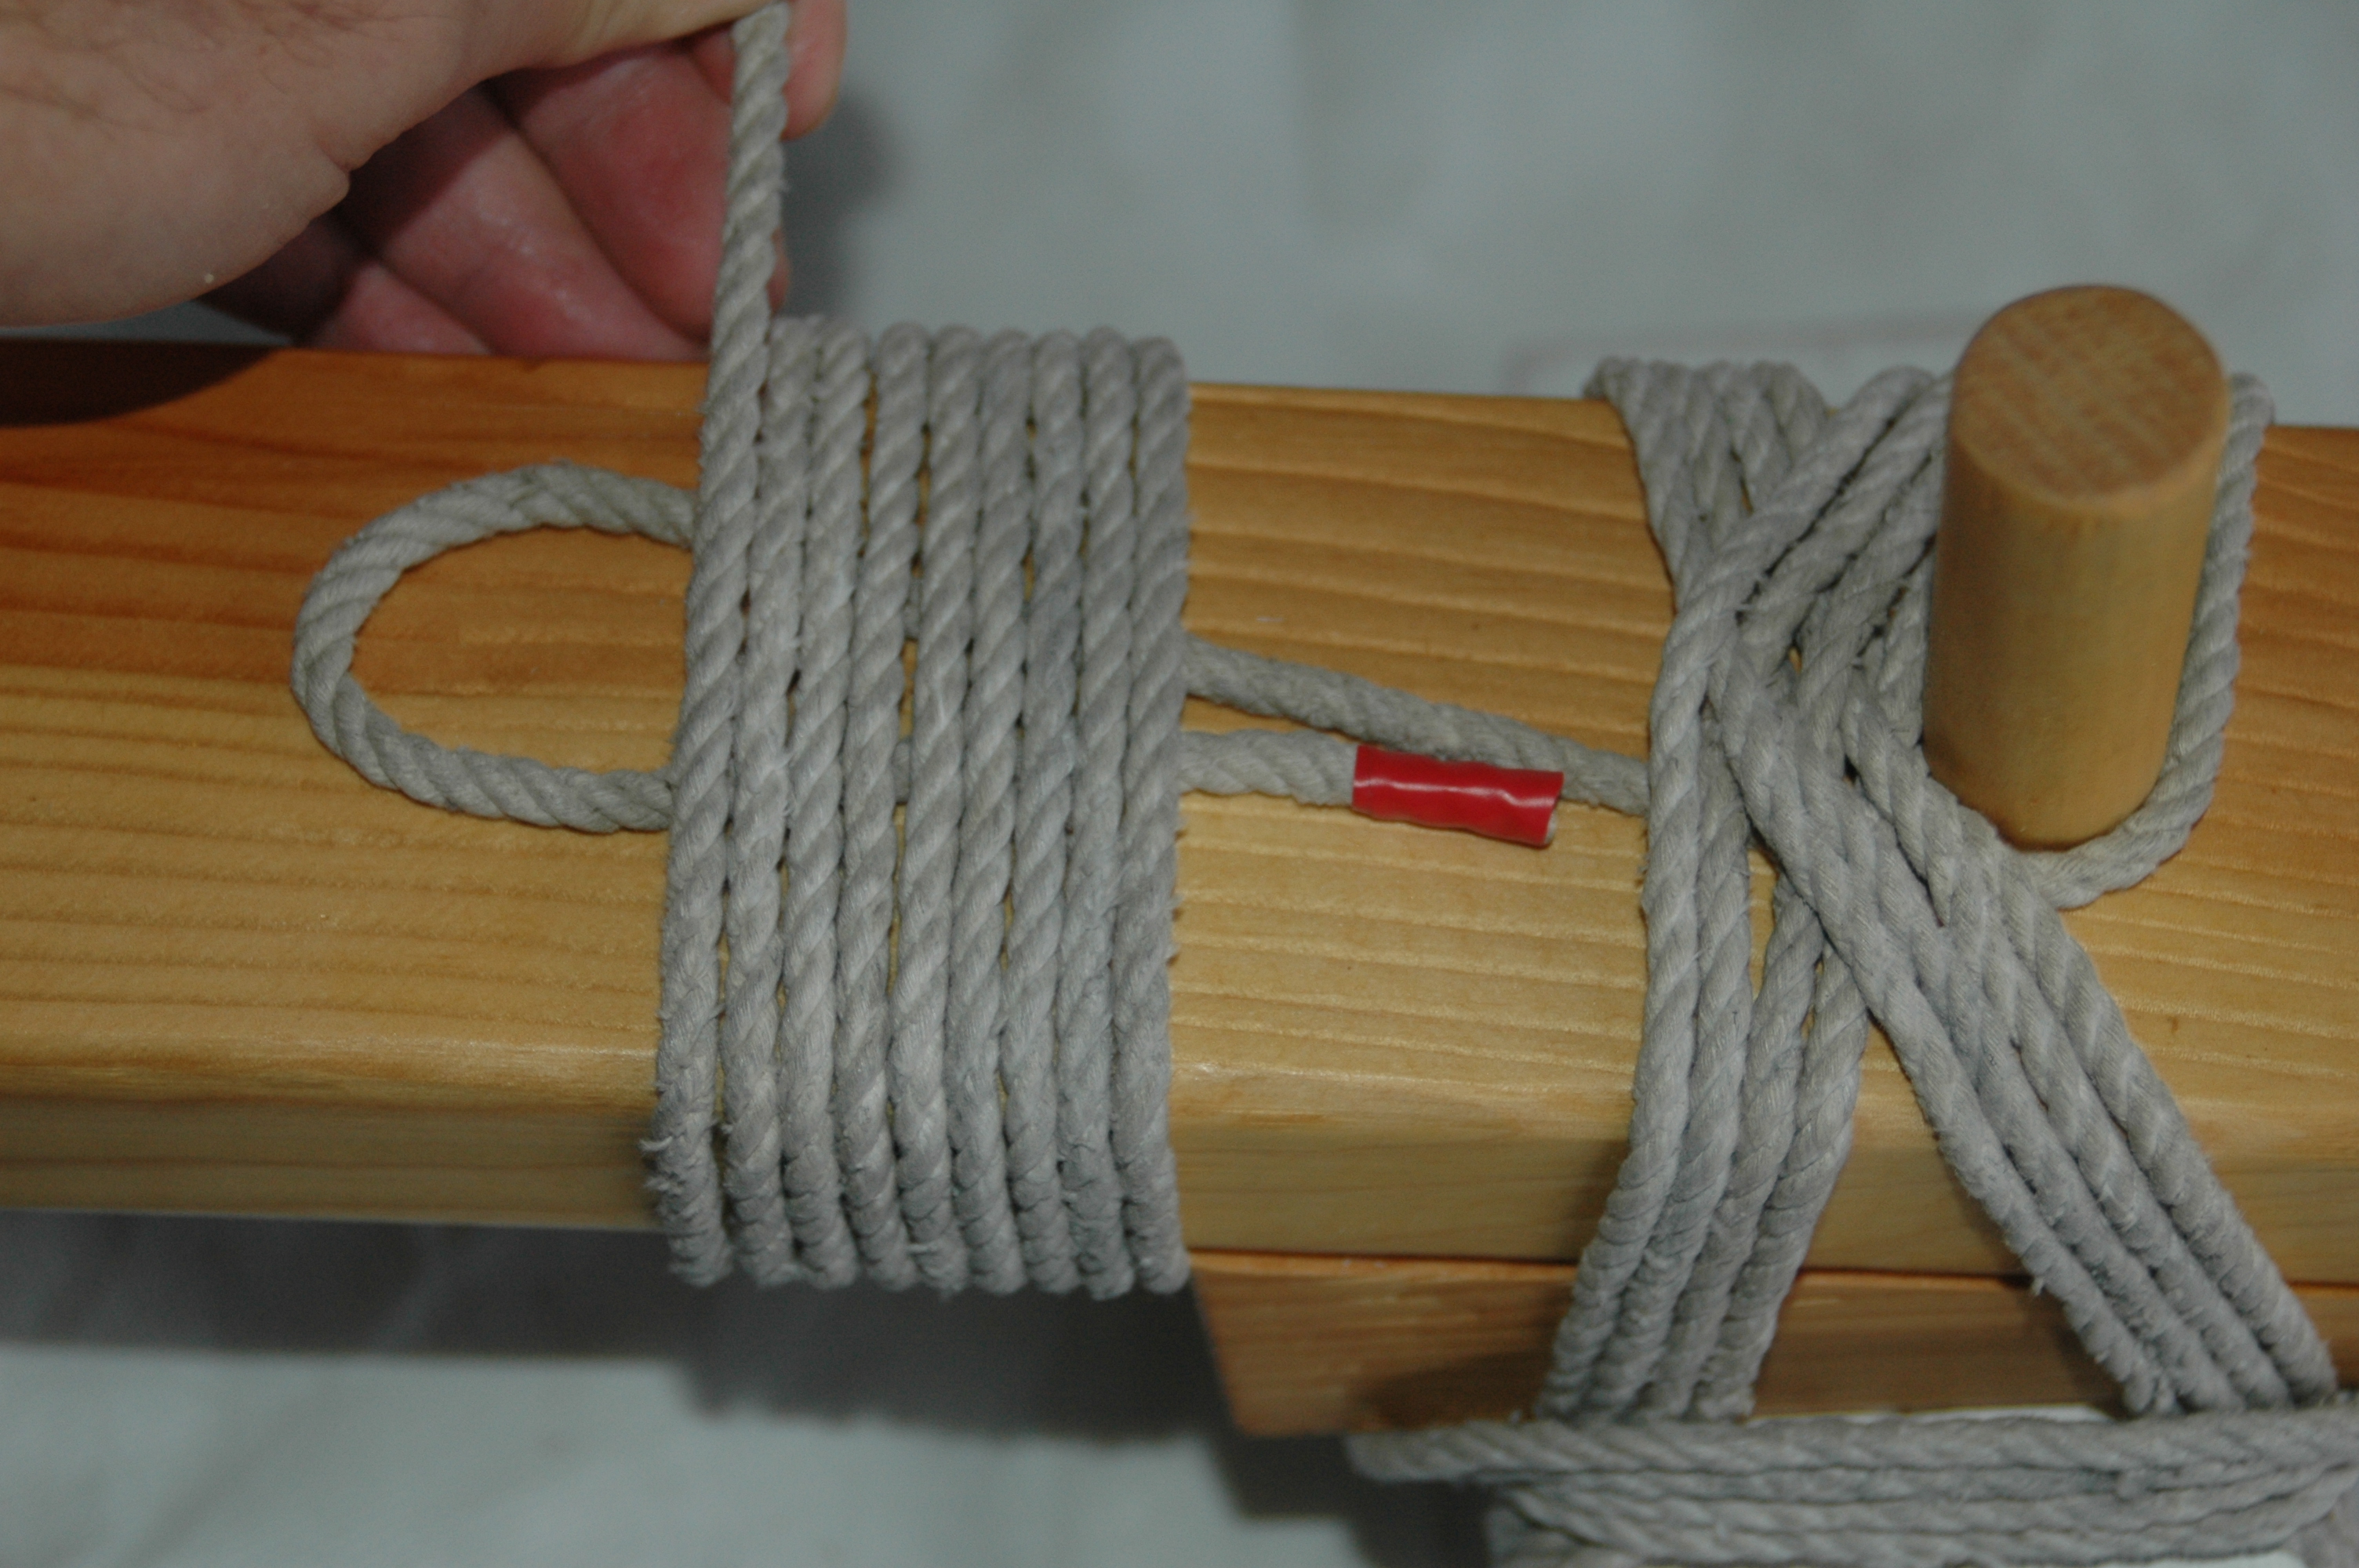
Tie the running end to the fixed end using a square knot (aka reef knot) NOT a granny knot (aka false knot). What is the difference? The granny knot will slip when loaded. With the square knot each loop passes completely over or completely under the neck of the other. Tie a square knot by left over right, tuck under, then right over left, tuck under. The granny (wrong) knot is left over right, tuck under,left over right, tuck under.
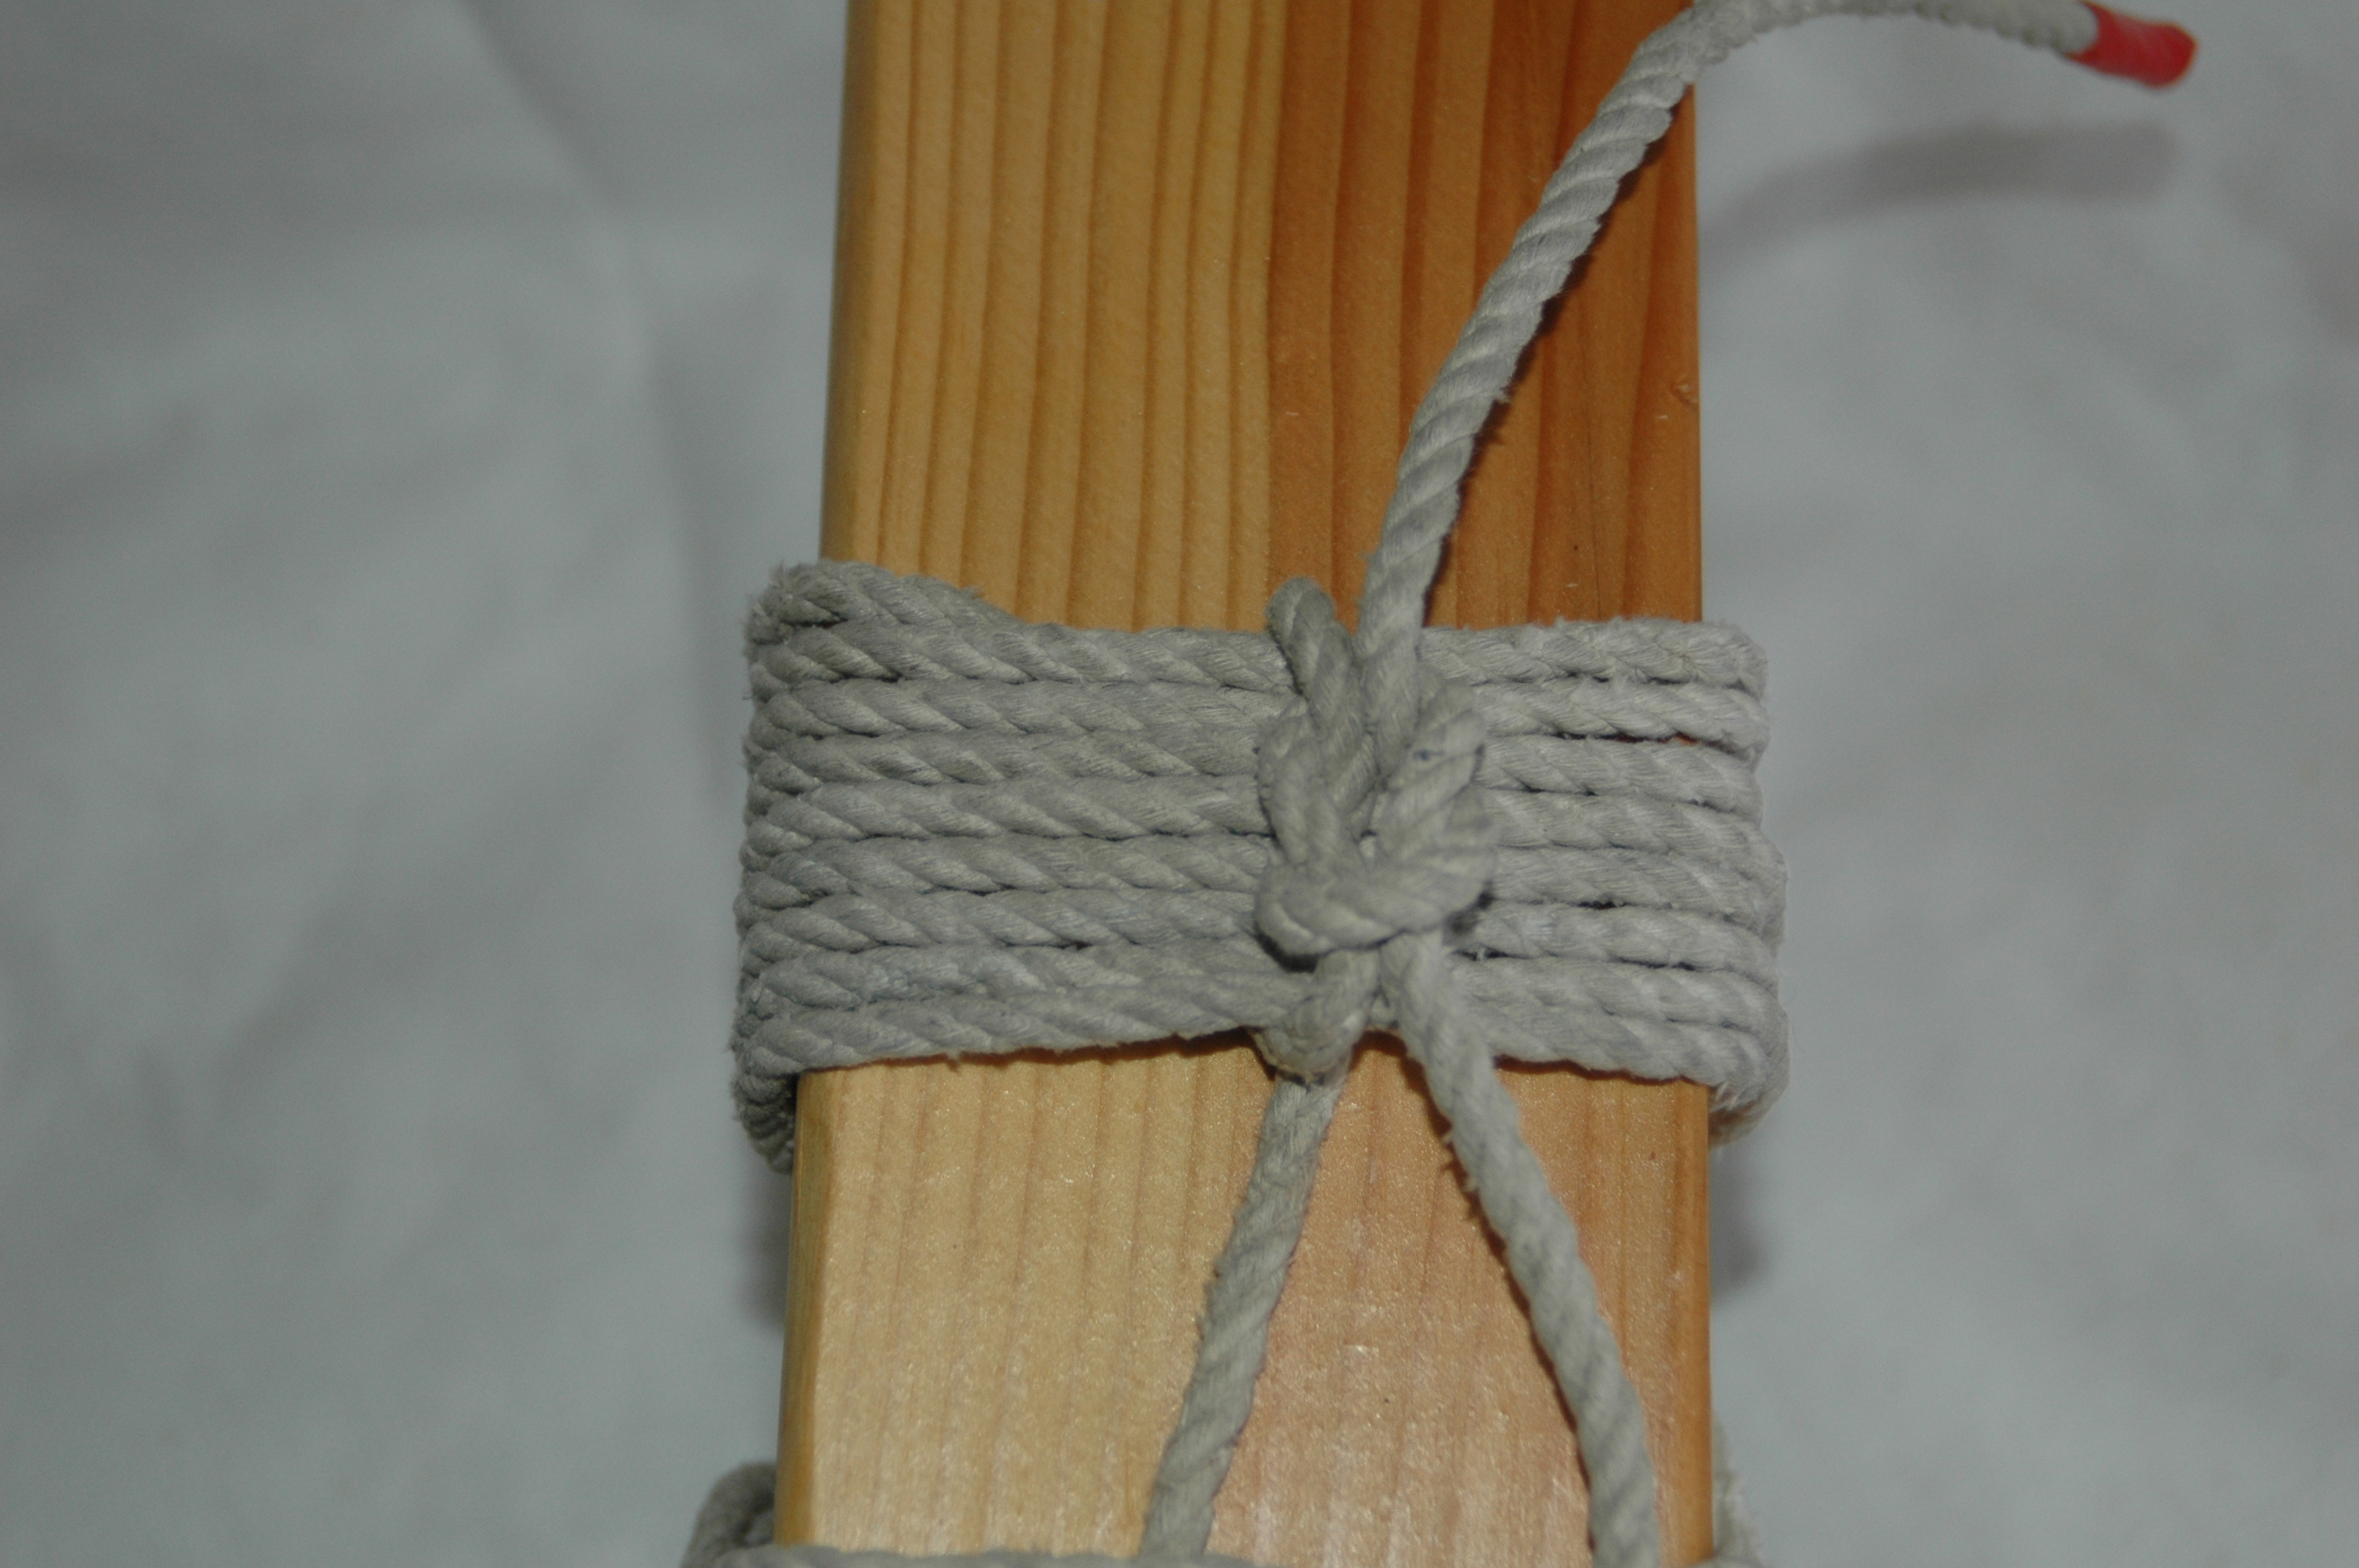
When done you can wrap over the knot with a length of rubber.